What to Do If You Fall Through Utah Ice While Fishing
The terrifying moment you feel the ice give way beneath your feet is every Utah ice angler's worst nightmare. It's a sudden, chilling plunge into frigid water that can disorient you in an instant and quickly become life-threatening. This guide isn't here to scare you, but to equip you with critical knowledge and actionable steps you can take to survive if you ever find yourself in the bone-chilling situation of falling through the ice while fishing in Utah.
Immediate Actions When You Fall Through the Ice
That initial shock is brutal. The cold water hits you, your breath is knocked out, and panic can easily set in. But in these crucial moments, your quick and correct actions are what can literally save your life. It's not about strength as much as it is about having a plan.
The 1-10-1 Rule: Your Survival Mantra
When you hit that icy water, your body is going to react dramatically. This isn't just discomfort; it's a physiological response that needs to be managed. The "1-10-1 Rule" is a widely recognized guideline for cold water immersion, and it's something every ice angler should engrain in their memory:
- 1 Minute: Control Your Breathing. The moment you fall in, the cold shock will cause involuntary gasping and hyperventilation. You have about one minute before your muscles start to lose their ability to function effectively. Do NOT panic. Focus intensely on getting your breathing under control. Take slow, deliberate breaths. This is the most important minute. If you can't control your breathing, you risk aspirating water and quickly losing the ability to think clearly. You might feel like you're drowning, but this initial gasp reflex will pass. Just focus on your breath.
- 10 Minutes: Self-Rescue and Purposeful Movement. Once your breathing is somewhat stabilized, you have about ten minutes of useful movement before you lose significant strength and coordination due to the cold. This is your window to perform self-rescue. Don't waste it flailing. Your body will start to cool rapidly, and your muscles will become stiff and weak. Every movement needs to be deliberate and focused on getting out. This isn't the time to worry about your fishing gear floating away; it's about getting yourself to safety.
- 1 Hour: Consciousness and Survival. If you haven't been able to self-rescue or get help within those first ten minutes, and you are still in the water, you still have about an hour before becoming unconscious due to hypothermia, provided you don't drown first. This isn't a license to stay in the water, but a reminder that even if you can't get out right away, there's still a chance for survival if rescue arrives. Huddle, conserve energy, and keep your airway clear. However, in Utah's often remote ice fishing locations, relying on this hour is a gamble; prioritize immediate self-rescue.
This rule emphasizes that the very first minute is crucial for mental composure, the next ten for physical action, and after that, it's about conserving energy and hoping for rescue.
Self-Rescue Techniques: Getting Out of the Water
Once you've managed your breathing, your next immediate goal is to get yourself out of the water and back onto solid ice. This is where having ice picks or a spud bar can be a game-changer. They aren't just for checking How to Check Ice Thickness Safely Before Ice Fishing; they are survival tools.
- Orient Yourself: Try to turn in the direction you came from, as that's likely where the ice was most recently thick enough to support you. This is also where you might have left a trail or where a buddy is located.
- Break More Ice (If Necessary): If the ice around the hole is too thin and crumbling, use your elbows or whatever tool you have (ice picks are ideal, but a spud bar or even your boots can work) to break a path to thicker, more stable ice. Don't pull yourself onto thin ice that will just break again.
- Use the "Swim and Kick" Technique:
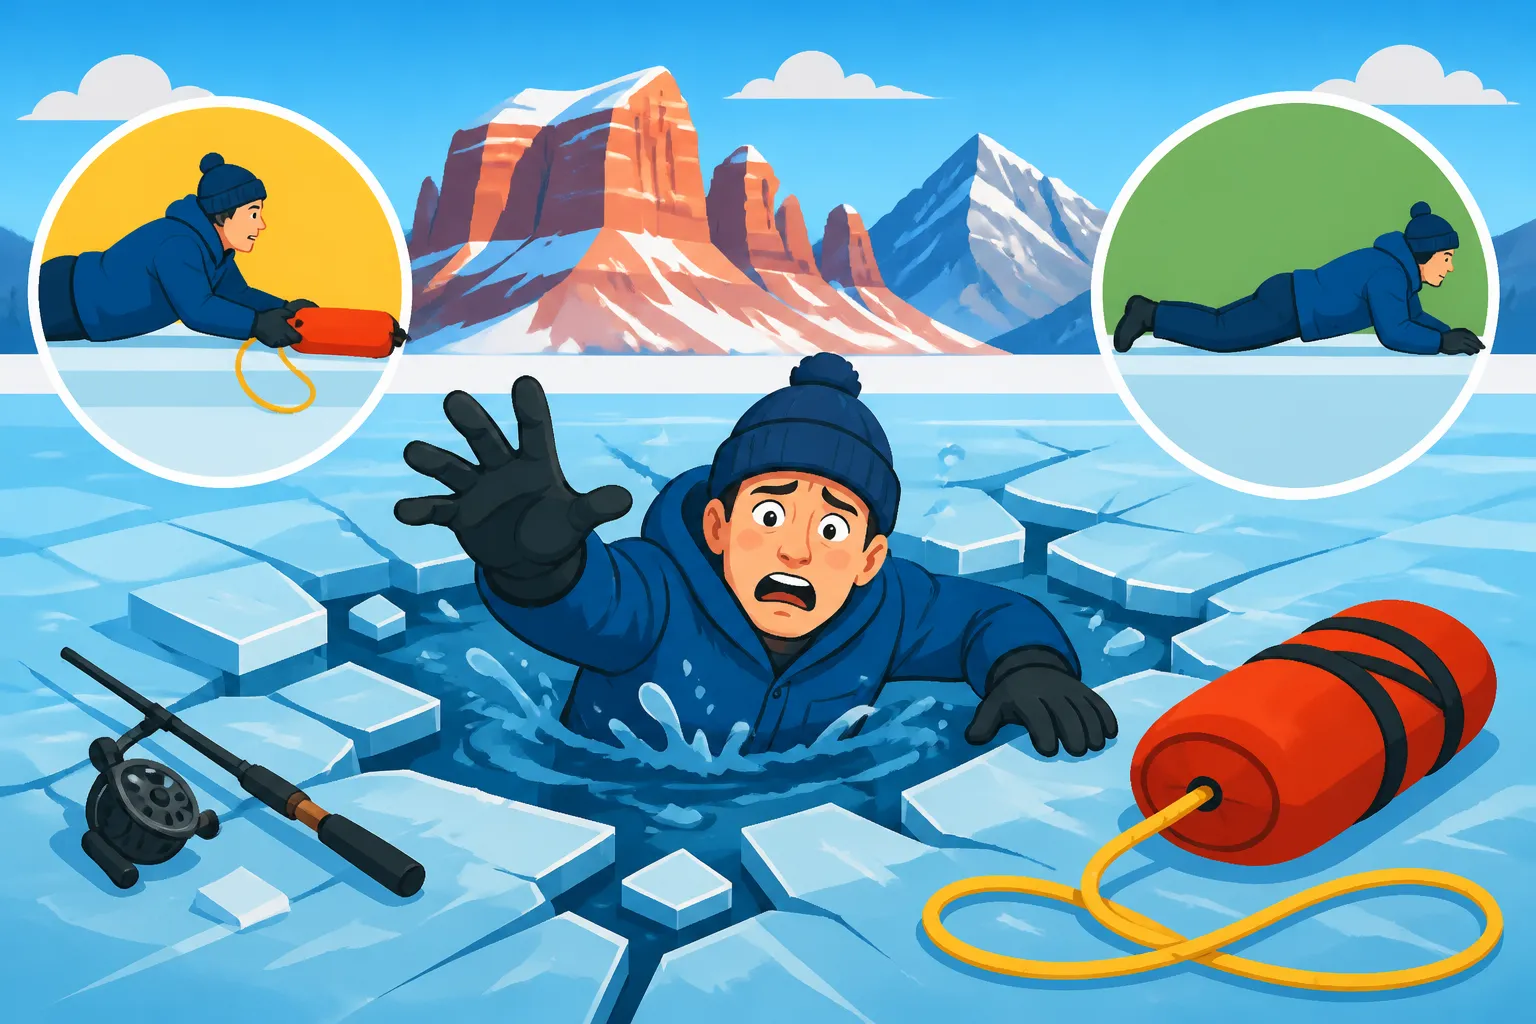
- Get Horizontal: Position your body horizontally in the water, as if you're swimming. Keep your head above water, facing the direction of solid ice.
- Propel with Kicks: Kick your legs vigorously, using the water for buoyancy and to help propel yourself forward.
- Reach and Grab: Extend your arms onto the ice, as far as you can. If you have ice picks, jam them into the ice. These provide grip and leverage, which is incredibly difficult to achieve on slick, wet ice without them. Many ice picks are designed with a whistle, which is a bonus if you need to attract attention.
- Inchworm/Roll Out: Once you have a good grip, try to kick your legs and pull yourself forward onto the ice, almost like an inchworm. Get as much of your upper body out as possible. Then, roll onto your back and continue to roll away from the hole, spreading your weight as much as possible to prevent breaking through again. Avoid standing up immediately, as this concentrates your weight in a small area. Crawl or roll to thicker ice before attempting to stand.
What to Do Once You're Out of the Water
Congratulations, you're out! But the danger isn't over. Your wet clothes are now drawing heat rapidly from your body, and hypothermia is a serious and immediate threat.
- Move Away from the Hole: Immediately crawl or roll a significant distance away from the open water and any cracked ice. You want to be on undeniably stable ice before you even think about standing.
- Assess Your Condition: Take a moment to check yourself for any injuries. Are you bleeding? Do you feel any broken bones? The adrenaline might mask pain initially.
- Signal for Help: If you have a whistle (many ice picks come with one, or you might have one on a life jacket), use it. Shout loudly. If you have a cell phone in a waterproof case, try to call for help. Don't assume someone saw you; make yourself known.
- Remove Wet Clothing (If Possible and Safe): This is counter-intuitive in cold weather, but wet clothing acts like a refrigerator, accelerating heat loss. If you have dry clothes accessible in a dry bag and a safe, sheltered spot, remove the wet layers and put on dry ones. If you don't have dry clothes, or if removing them exposes you to even harsher winds, it might be better to get to shelter first, then change. This is a judgment call based on your immediate environment. The key is to stop the continuous heat loss from evaporation.
Remember, every second counts. Don't underestimate the power of the cold.
After the Immediate Danger: Seeking Help and Preventing Hypothermia
Getting out of the water is a huge step, but the battle isn't over. Now you need to focus on getting warm and getting to definitive safety. This is where planning and preparedness truly pay off.
Signalling for Help and Contacting Emergency Services
Once you're safely away from the hole, your priority shifts to getting help. Many Utah ice fishing spots can be quite remote, so you can't always rely on someone seeing you.
- Loud and Clear: If you're with a fishing buddy, make sure they know you're out and safe, but still need help. Shout, use a whistle, or any other noise-making device you have. How to Fish Safely Alone on Utah Ice covers specific considerations for solo anglers, but even with a buddy, clear communication is essential.
- Cell Phone/Satellite Communicator: A fully charged cell phone in a waterproof, insulated case is critical. Cold drains batteries quickly. Dial 911 (or your local emergency number) immediately. Be prepared to give your exact location, describe what happened, and your current condition. For truly remote areas, a satellite communicator (like a Garmin InReach or Spot device) is an invaluable investment, as cell service is often nonexistent. These devices allow you to send SOS signals and messages even without cell reception.
- Visual Signals: If you can't make a call, think about visual signals. Wave your arms overhead. If you have a bright piece of clothing or gear, tie it to a tall object to increase visibility. Flares or signal mirrors (though less common for ice fishing) can also be effective if you see another party.
- Stay Put (If Safe): Unless you know for certain that walking will get you to shelter faster and more safely, it's often better to stay put once you're out and signal for help. Moving while wet and shivering can accelerate hypothermia and lead to further exhaustion or falls.
Hypothermia: Understanding the Risk and First Aid
Hypothermia is the body losing heat faster than it can produce it, leading to a dangerously low core body temperature. It's a real and present danger after cold water immersion.
- Recognizing Symptoms:
- Mild Hypothermia: Shivering (often uncontrollable), chattering teeth, confusion, mild clumsiness, pale skin.
- Moderate Hypothermia: Violent shivering stops, increasing confusion, slurred speech, lethargy, loss of coordination, blue-tinged skin, slow and shallow breathing.
- Severe Hypothermia: Unconsciousness, no shivering, rigid muscles, very slow or absent breathing and pulse. This is a medical emergency.
- First Aid Steps (for yourself or a buddy):
- Get to Shelter: The absolute priority is to get out of the wind and elements. An ice fishing shelter or even a vehicle can provide crucial protection.
- Remove Wet Clothing: If you haven't already, remove all wet clothing. Cut it off if necessary to avoid excessive movement or struggle.
- Dry and Insulate: Gently dry the person, especially the head and torso. Wrap them in dry blankets, sleeping bags, or towels. Layering is key. How to Layer Clothing for a Utah Winter Fishing Trip offers great advice on insulation. If you have a space blanket (often found in first-aid kits and available from retailers like Amazon), deploy it under or over other insulation to reflect body heat.
- Share Body Heat: If necessary and appropriate, huddle close with a conscious person, skin-to-skin contact if possible, under shared blankets to transfer warmth.
- Warm Drinks/Food: If the person is conscious and not nauseated, offer warm, non-alcoholic, non-caffeinated drinks (like warm water or broth) and high-energy foods (like candy bars). Do NOT give alcohol, which actually speeds up heat loss, or caffeine, which can cause dehydration.
- Avoid Rubbing: Do not rub cold extremities, as this can damage tissues.
- Monitor: Keep a close eye on their condition. If they are unresponsive or severely hypothermic, treat it as a critical medical emergency and wait for professional help.
Safely Getting Back to Shore and Beyond
Once you're out of the water, and possibly in a temporary shelter, the next challenge is getting back to your vehicle or home safely.
- Move Slowly and Deliberately: Your body is still recovering from extreme shock and cold. Walk slowly. Take small, deliberate steps. The ice can still be slick, and your coordination might be compromised.
- Consider a Snowmobile/ATV: If you have access to a snowmobile or ATV, and it's safe to operate, this can significantly speed up your return to warmth. Make sure it's running well and you're not further exposing yourself to wind chill.
- Call for a Ride: If you are too weak, disoriented, or simply too cold to drive safely, don't hesitate to call a friend or family member to come pick you up. Pride has no place in a survival situation.
- Seek Medical Attention: Even if you feel fine after getting warm, it's wise to get checked out by a medical professional. Cold water immersion can have lingering effects, and sometimes internal injuries aren't immediately apparent.
Prevention is Key: Gear and Safety Practices
The best way to handle falling through the ice is to never let it happen in the first place. This means being prepared, understanding the risks, and using common sense.
Essential Safety Gear for Ice Fishing
You wouldn't go hiking without appropriate shoes, and you shouldn't go ice fishing without the right safety gear. These items are truly non-negotiable.
- Ice Picks: These are small, sharp tools connected by a cord that you wear around your neck. If you fall in, you can plunge them into the ice for grip to pull yourself out. They are incredibly effective and easily obtainable from fishing retailers or online at Amazon. Do not leave home without them.
- Flotation Suit (Float Suit): This is perhaps the single most important piece of clothing for ice safety. A high-quality flotation suit, often a two-piece jacket and bib design, offers two critical benefits:
- Buoyancy: It's designed to keep you afloat if you go through the ice, giving you precious time to self-rescue or await help.
- Insulation: It provides excellent thermal insulation, slowing down the onset of hypothermia. Brands like Clam or Striker make excellent options, offering warmth and safety in one package.
- Spud Bar or Ice Auger: Beyond checking for ice thickness, a heavy spud bar can also be used as a rescue tool if you need to break a path to thicker ice. Similarly, an Best Ice Augers for Utah Ice Fishing can serve a dual purpose – drilling holes for fishing and assessing ice conditions.
- Rope/Throw Bag: A length of sturdy rope (at least 50 feet) with a floatable end can be thrown to someone who has fallen through. Keep it easily accessible on your sled or in your Utah Ice Fishing Gear Guide.
- Whistle: Many ice picks include one, but a separate loud whistle is a simple, effective way to signal for help.
- First-Aid Kit: A basic first-aid kit, including a space blanket, is essential for any outdoor excursion.
- Waterproof Bag/Dry Bag: Keep a change of clothes, a fire starter, and a fully charged cell phone in a waterproof dry bag. This bag could be the difference between a minor scare and a major emergency.
Assessing Ice Conditions Before You Go
Understanding ice conditions is paramount. Don't rely on assumptions or hearsay.
- Visual Inspection: Look for visual cues. Clear, blue ice is generally stronger than cloudy, white, or gray ice. Avoid areas with cracks, pressure ridges, or areas where the ice looks discolored.
- Ice Thickness Guidelines: Always follow the recommended ice thickness guidelines.
- 2 inches or less: STAY OFF
- 4 inches: Suitable for ice fishing on foot (single person)
- 5-7 inches: Suitable for a snowmobile or ATV
- 8-12 inches: Suitable for a small car or light truck
- 12-15 inches: Suitable for a medium truck
Remember, these are general guidelines for clear, new ice. Slushy, cracked, or old ice can be much weaker. Always check local conditions and warnings.
- Use a Spud Bar or Auger: As you venture out, periodically test the ice in front of you with a spud bar or by drilling small holes with an auger. This is how you confirm How Thick Does Utah Ice Need to Be Before You Can Fish On It?. If the ice starts to get thinner than recommended, turn back.
- Know Your Water Body: Different water bodies in Utah freeze and thaw differently. Rivers and areas with currents will have weaker ice than still reservoirs. Inlets and outlets are almost always thinner. South-facing shores or areas with springs can also have inconsistent ice. For example, some areas of Strawberry Reservoir Ice Fishing Spots might freeze differently than other locations.
Fishing with a Buddy and Communication
While ice fishing can be a serene solo activity, safety in numbers is invaluable.
- Never Fish Alone: If possible, always go with a buddy. If you fall in, they can help pull you out, call for help, and provide critical first aid. How to Fish Safely Alone on Utah Ice covers specific precautions if you absolutely must go solo, but it's always riskier.
- Maintain Distance: Even with a buddy, don't clump together. Spread out to distribute weight over a larger area of ice. This lessens the chance of a shared disaster.
- Clear Communication: Let someone know where you are going, your planned route, and when you expect to return. Leave a float plan with a trusted person. If you're out with others, establish a system for checking in on each other, especially if you're in separate shelters or spread out.
- Designate a Spotter: When moving across unfamiliar ice, have one person act as a spotter, watching for thin ice or cracks, especially if someone is operating a snowmobile or ATV.
Common Misconceptions and Additional Safety Tips
There are many myths about ice safety that can lead to dangerous situations. Dispelling these and adding a few extra tips can make a huge difference.
Myths About Falling Through Ice
Let's clear up some common misconceptions that can be deadly.
- Myth: "The ice is thick enough because someone else just drove across it." This is incredibly dangerous thinking. Ice conditions can change dramatically over short distances. Water currents, underwater springs, and variations in depth can create treacherous thin spots even steps away from stable ice. Always test the ice yourself.
- Myth: "You'll immediately freeze solid." While the cold shock is severe, the 1-10-1 rule reminds us you have precious minutes, even up to an hour for consciousness, to act. Panic is your biggest enemy, not immediate freezing.
- Myth: "You should stand up immediately if you get out." As mentioned, standing up concentrates your weight. Crawling or rolling helps distribute your weight and reduces the chance of breaking through again. Get well onto stable ice before attempting to stand.
- Myth: "A light jacket is fine if you're wearing layers." While How to Layer Clothing for a Utah Winter Fishing Trip is excellent advice for staying warm, a standard jacket offers no flotation. A flotation suit provides buoyancy that layers alone cannot.
- Myth: "My phone will be fine in my pocket." Your phone will likely be ruined by water and the battery will die from the cold. A waterproof, insulated case is non-negotiable if you plan to rely on your phone for emergencies.
What to Do If Someone Else Falls Through
It's not always you who falls in. Knowing how to help a buddy can be just as crucial.
- Don't Rush In: Your first instinct might be to rush to them, but this is dangerous. If the ice couldn't hold them, it probably can't hold you either.
- Call for Help: Immediately call 911 or emergency services. The faster professionals arrive, the better.
- Reach, Throw, Go: This is the mantra for helping someone:
- Reach: If you can safely reach them from solid ice using a long pole, branch, or even your ice auger, do so. Lie flat on your stomach to distribute your weight, and extend the object.
- Throw: If you can't reach, throw them a rope, a throw bag, a spare tire, a life preserver, or even a backpack. Anything that floats and they can grab onto.
- Go: If you absolutely cannot reach or throw anything, and there's no other option, and only if you have proper training and safety equipment yourself, then you might consider carefully trying to go to them using a rescue board or boat. However, this is extremely risky and should be a last resort. Your own safety is paramount.
- Talk to Them: Keep talking to the person in the water. Reassure them, tell them help is coming, and instruct them to try and stay calm and conserve energy.
Post-Incident Care and Mental Preparedness
After an incident like this, both physical and mental well-being are important.
- Warm Up Gradually: Once safe and dry, warm up slowly. Don't blast yourself with extreme heat, as this can be dangerous. Gradual rewarming is key.
- Seek Counseling: A cold water immersion event can be traumatic. Don't be afraid to talk about it with trusted friends, family, or even a professional if you find yourself struggling with anxiety or fear afterward. It's a natural reaction to a life-threatening experience.
- Learn from It: Review what happened. What could have been done differently? What equipment helped? Use the experience as a powerful lesson to reinforce safe ice fishing practices for future trips.
- Prepare Your Gear for Next Time: After the immediate crisis, make sure all your safety gear is in good working order. Restock your first-aid kit, check your ice picks, and ensure your flotation suit is ready.
Here's a quick reference for essential ice safety gear:
| Item | Purpose | Where to Keep It |
|---|---|---|
| Ice Picks | Self-rescue grip for pulling out of water | Around your neck, easily accessible |
| Flotation Suit | Buoyancy and thermal insulation | Worn as your outermost layer |
| Spud Bar / Auger | Checking ice thickness; can be a reach/rescue tool | In hand or easily accessible on sled |
| Throw Bag / Rope | Throwing to someone who has fallen in | Accessible on sled, outside of shelter |
| Whistle | Signaling for help | Attached to ice picks or life jacket |
| Waterproof Phone Case | Protecting cell phone for emergency calls | Inside warm, inner pocket, accessible |
| Dry Bag | Keeping spare dry clothes, fire starter, etc., dry | Attached to sled, inside ice fishing shelter |
| First-Aid Kit | Treating injuries, includes space blanket for warmth | Easily accessible in shelter or backpack |
| Ice Cleats (optional) | Preventing slips and falls on slick ice | Worn on boots |
The joy of Utah ice fishing, whether at a popular spot like Strawberry Reservoir Ice Fishing Spots or a more remote high-altitude lake, is undeniable. But that joy should never come at the expense of safety. Being prepared for the worst-case scenario means you can fish with greater confidence, knowing you have the knowledge and tools to handle an emergency.
Disclaimer
This article is for general informational purposes only and does not constitute professional advice. Laws, prices and regulations vary by location and change over time. Consult a qualified professional for guidance on your specific situation.