How to Read a Fish Finder for Utah Reservoirs
It can be incredibly frustrating to invest in a fancy fish finder, get out on a beautiful Utah reservoir, and then stare at a screen full of squiggles, lines, and blobs, having no idea what any of it actually means. You know there are fish down there, or at least you hope there are, but your expensive electronics feel more like a modern art display than a helpful tool. This guide is here to change that, breaking down exactly how to read your fish finder for Utah waters, so you can transform those confusing pixels into actionable fishing intelligence.
Understanding the Basics of Your Fish Finder Display
Before you can start interpreting specific targets, it’s crucial to grasp the fundamental information your fish finder is constantly collecting and displaying. Think of your screen as a real-time sonar map, painting a picture of what's directly beneath your boat. The journey of understanding starts with the very basics: depth, bottom, and water column.
How Sonar Works and What You're Seeing
At its core, a fish finder works by sending out sound waves (sonar pulses) from a transducer mounted on your boat. These sound waves travel through the water, bounce off objects like the bottom, fish, or even submerged structure, and then return to the transducer. Your fish finder unit then measures the time it takes for these sound waves to return and uses that information to calculate distance. The faster the return, the shallower the object. This constant process creates a scrolling image on your screen, with the right side showing the most current information and older data scrolling to the left. The beauty of modern units is how quickly and accurately they do this, allowing you to see changes in depth, identify targets, and understand the underwater terrain as you move. Without this foundational understanding, everything else just looks like noise.
Key Display Components and Their Significance
Your fish finder screen is typically divided into several key areas, each providing vital information. At the top, you'll almost always see a digital depth reading, which is arguably the most crucial piece of data. This tells you how far down the bottom is directly under your transducer. Along the bottom of the screen, you'll see a solid or shaded band representing the lakebed. This 'bottom trace' is incredibly important for understanding contours, drop-offs, and humps – key areas where fish love to hang out. The vast space between the surface (the top of your screen) and the bottom trace is the "water column." This is where you'll be looking for fish, bait balls, and suspended structure. Understanding these three basic elements – depth, bottom, and water column – is the launchpad for all further interpretation. Without knowing the depth, any fish reading is simply a suspended anomaly.
Interpreting Arches, Lines, and Dots on Your Screen
The moment you spot something other than a flat bottom or empty water, your angler's intuition kicks in. But what exactly are those shapes? Are they fish? Weeds? A random submerged log? Decoding these visual cues is where the magic happens, turning guesswork into educated angling decisions.
Differentiating Between Fish Arches and Other Signals
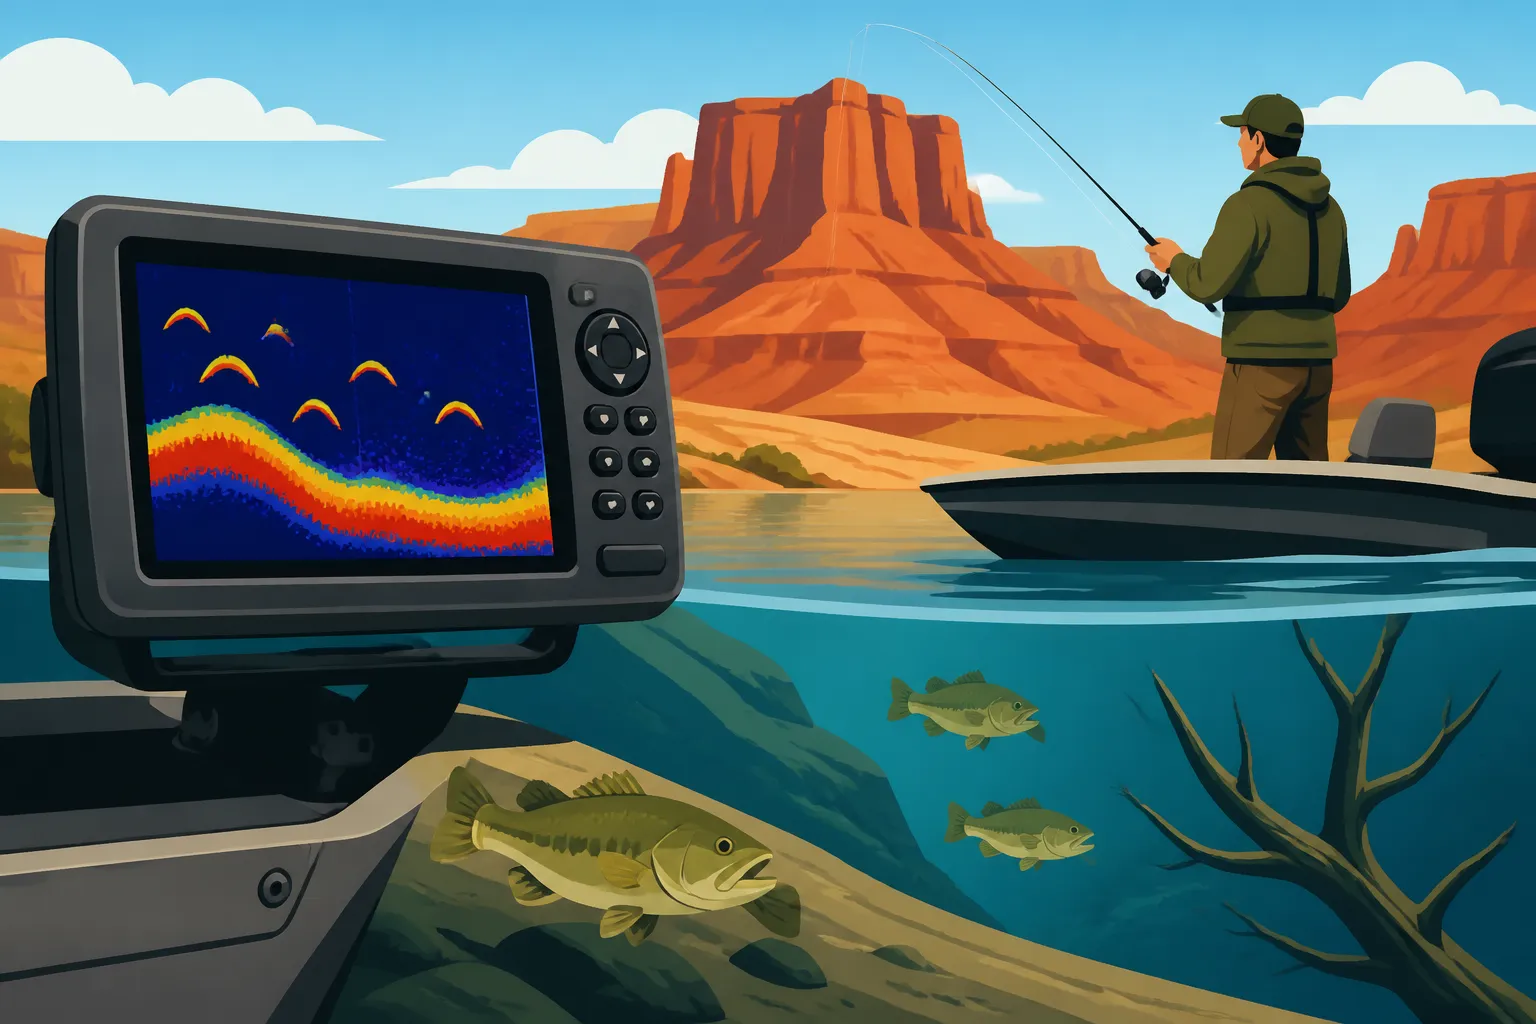
The holy grail for most anglers looking at a fish finder is the classic "arch." A well-formed arch typically indicates a fish. This shape occurs because as your boat moves over a fish, the sonar beam first hits the fish when it's at the edge of the cone, then directly overhead, and then again as it moves out of the cone on the other side. This creates a longer return signal that paints an arch. The size and thickness of the arch can give you clues about the fish's size – larger, thicker arches generally mean bigger fish. However, not every arch is a fish! Sometimes, a boat moving slowly over a perfectly still, suspended log or a weed clump could create an arch. The key is to look for consistency and movement. Fish are living creatures; they don't stay perfectly still. If you see a perfect, consistent arch that appears and disappears quickly, often in open water, there's a good chance it's a fish. In contrast, if you're marking an arch that lingers or is consistently in the same spot, it might be structure. Many experienced anglers will often circle back over an interesting arch to see if it reappears in the same spot or if it's gone.
Identifying Baitfish Schools and Individual Fish
Beyond those distinct arches, you'll often see clusters of smaller dots or hazy clouds. These are almost always baitfish. In Utah reservoirs like Strawberry or Flaming Gorge, you'll frequently see dense schools of kokanee salmon or chub, especially when trolling. These bait balls appear as amorphous blobs or dense clouds of pixels. Knowing these are baitfish is crucial because where there's bait, there are usually predators. If you see a tight ball of baitfish with larger, distinct arches lurking around the edges or just below, you've likely found a feeding zone for game fish like trout, walleye, or bass. Individual game fish, especially larger ones like the lake trout in Flaming Gorge, might appear as very strong, distinct arches, often thicker and more vibrant than smaller fish. Sometimes, slower-moving fish or fish that are directly under the transducer for only a brief moment might show up as short dashes or thick lines rather than full arches. Don't dismiss these; they could still be significant fish. Learning to differentiate these signals is key to determining whether you're over a thriving ecosystem or just a few scattered wanderers.
Decoding Bottom Structure and Depth Readings
The bottom is far more than just "the bottom." It’s an underwater landscape teeming with potential hiding spots, feeding grounds, and travel lanes for fish. Properly interpreting the bottom trace and understanding how depth changes are presented can unlock a whole new dimension of fishing strategy.
Reading Contours, Drop-Offs, and Humps
The line or band that represents the bottom of the lake on your fish finder screen tells a story. A flat, unwavering line indicates a consistent, featureless bottom. But watch for changes! If the line suddenly drops, you've found a "drop-off" or "break line." These are absolute magnets for fish, as they offer quick access to different depths, temperature zones, and ambush points. Conversely, if the bottom rises, you're looking at a "hump," "point," or "ridge." These elevated structures act like underwater islands, concentrating baitfish and attracting predators. Pay close attention to the slope of these features. A gradual slope might be less productive than a sharp, abrupt change. The steeper the change, the more likely fish are to relate to it. Mastering the ability to read these contours allows you to visualize the underwater terrain and predict where fish might be holding, even before you see a single arch. For example, if you're targeting walleye at Utah Lake, finding those subtle humps and transition zones on the bottom can be incredibly productive.
Identifying Submerged Cover and Habitat
Beyond the overall shape of the bottom, your fish finder can also reveal the type of material on the lakebed and any submerged cover. A hard bottom, like rock or gravel, will typically show a thicker, more defined bottom trace, often with a "secondary echo" below it (a fainter second bottom line, indicating how much energy bounced off the hard surface). A soft bottom, like mud or silt, will appear as a thinner, less distinct line, with no secondary echo. This distinction is important because different fish species prefer different bottom types. Trout often relate to rocky areas, while catfish might favor softer, mucky bottoms.
You'll also see signals indicating submerged cover. Trees, brush piles, and even old foundations can show up as irregular shapes rising from the bottom. These often appear as jagged, fuzzy, or dense clusters of pixels, differing greatly from the clean arches of fish. If you see fish arches within or around these cover elements, you've found a prime location. This is especially true for bass fishing in reservoirs like Deer Creek or Jordanelle, where submerged timber or old creek beds provide critical habitat. Modern units, particularly those with side imaging or down imaging, available through retailers like Amazon, can give you incredibly detailed, photographic-like views of these submerged structures, making them much easier to identify than traditional 2D sonar. For a better understanding of what your specific unit offers, checking out reviews and product descriptions on Amazon before you buy can make a huge difference.
Identifying Baitfish and Game Fish on Your Finder
While we've touched on this briefly, honing in on the specific characteristics that distinguish baitfish from game fish on your screen is paramount. It’s not just about seeing something, but about understanding what you’re seeing so you can adjust your tactics accordingly.
Characteristics of Bait Balls and Their Importance
Baitfish are the foundation of any healthy fishery. On your fish finder, they usually appear as dense, amorphous clouds or tightly packed schools of small dots. The size and density of these schools can vary greatly. Sometimes they’ll be relatively small, isolated clumps, while other times they can be massive, spanning significant portions of the water column. The presence of bait balls is a major indicator of potential fishing success. Game fish are rarely far from their food source. If you locate a large school of baitfish, you should immediately start looking for larger, distinct arches or strong lines around, above, or beneath them. Often, predatory fish will push bait against structure, into coves, or towards the surface, creating what anglers call "bait boils" or "slicks." Your fish finder is your eyes below the surface for detecting these critical feeding frenzies. Pay attention to how high in the water column the baitfish are. If they're high, closer to the surface, it might indicate active feeding or a specific temperature zone. If they're deep, it suggests the game fish might also be holding deeper.
Distinguishing Between Different Game Fish Species
While a fish finder can't definitively tell you "that's a brown trout" versus "that's a rainbow trout," it can provide clues about the type of game fish you're seeing based on size, behavior, and where they're holding in the water column.
- Trout (Rainbow, Cutthroat, Brown): Often appear as distinct arches. Rainbows and cutthroat, especially stocked fish, might be more scattered or in loose schools. Brown trout, particularly larger ones, are often more solitary and relate very tightly to structure or the bottom. If you're fishing a deep, cold reservoir like Flaming Gorge, big lake trout (Mackinaw) will show up as massive, often elongated and very dense arches, typically holding tight to the bottom in deep water, or suspended over deep structure. Learning how to identify Utah trout species by their behavior can help you interpret your screen.
- Walleye: These fish are notorious bottom-huggers. On your fish finder, walleye often appear as strong, dense lines or arches very close to the bottom, sometimes even appearing to be "stuck" to it. They might be in schools or scattered, but their close proximity to the lakebed is a key identifier. When trolling for walleye at Utah Lake, you’ll be specifically looking for these bottom-oriented marks.
- Bass (Smallmouth, Largemouth): Bass are often structure-oriented. Smallmouth bass, especially in rocky reservoirs like Flaming Gorge, will show up as distinct arches near rocky points, ledges, or submerged boulders. Largemouth bass in warmer, weedier lakes might be harder to distinguish, as they can hold tight in dense vegetation, which shows up as a "fuzzy" bottom. Look for distinct arches within or just above heavy cover for bass.
- Striped Bass/Wiper: At Lake Powell, striped bass can be found in massive schools, often indicated by huge, dense clouds of fish sometimes extending from the bottom to near the surface. These "boils" or "schools" are unmistakable. Wiper at Willard Bay exhibit similar schooling behavior and can create dense marks. Look for these large, active groups that often chase baitfish to the surface.
- Panfish (Perch, Bluegill): Smaller fish like perch or bluegill will appear as small dots or very faint arches. They are often found in large, dense schools, especially perch when ice fishing. These schools can sometimes be mistaken for baitfish, but if you're seeing them consistently in areas known for panfish and can discern larger individual marks within the school, it's a good bet.
Remember, fish behavior is dynamic. The more time you spend on the water with your fish finder, paying attention to what you catch versus what you see on the screen, the better you'll become at accurately identifying targets.
Advanced Fish Finder Features and Settings
Modern fish finders are incredibly sophisticated tools, offering a suite of features designed to give you an unparalleled view of the underwater world. Understanding and properly utilizing these advanced settings can dramatically improve your ability to read the screen and, consequently, your fishing success.
Adjusting Sensitivity, Gain, and Frequencies
These three settings are perhaps the most critical for fine-tuning your fish finder's performance.
- Sensitivity/Gain: This controls how much detail your unit displays. Too low, and you'll miss faint signals, making fish appear as weak dots or disappear entirely. Too high, and your screen will be cluttered with noise, making it difficult to distinguish actual targets from interference. The goal is to set your sensitivity as high as possible without creating excessive clutter. You'll want to adjust this regularly based on water conditions (clarity, depth, temperature) and your target species. For example, if you're in very deep water trying to mark subtle movements of lake trout, you might need higher gain.
- Frequencies: Most fish finders operate on different frequencies (e.g., 50 kHz, 83 kHz, 200 kHz). Lower frequencies (like 50 kHz) penetrate deeper and give a wider cone angle, which is great for deep water at places like Flaming Gorge or Lake Powell, covering a larger area beneath the boat. Higher frequencies (like 200 kHz) provide finer detail and a narrower cone, making them ideal for shallower water and distinguishing individual fish or tight structure more clearly. Some units offer CHIRP sonar, which sweeps through a range of frequencies, providing superior target separation and clarity at all depths. Understanding how to use different frequencies or let your CHIRP unit do its job effectively is key for getting the best picture. For deep reservoirs, choosing the best fish finder frequency for deep Utah reservoirs is a critical decision.
Utilizing Down Imaging and Side Imaging
These technologies have revolutionized how anglers view the underwater world.
- Down Imaging (DI): Instead of traditional 2D sonar's cone-shaped beam, down imaging uses a very thin, fan-shaped beam that sends pulses straight down, creating a photographic-like image of what's directly below your boat. Fish show up as bright white spots or "blobs" with distinct shadows, and structure appears with incredible detail – you can often identify individual branches on a submerged tree. This is particularly useful for pinpointing fish holding tight to bottom structure or suspended precisely within a cover.
- Side Imaging (SI): Taking it a step further, side imaging (also known as SideVu or SideScan) sends thin beams out to the sides of your boat, scanning the bottom and water column for hundreds of feet in either direction. This allows you to literally see the underwater landscape to your left and right, revealing structure, bait schools, and fish that would be completely missed by a traditional 2D or even down imaging beam directly under the boat. For finding vast schools of striped bass at Lake Powell or mapping out contours and submerged points at Utah Lake, side imaging is an invaluable tool. It allows you to quickly cover large areas and locate potential hotspots without driving directly over them. Many anglers find it essential for figuring out whether they need side imaging to find fish at Flaming Gorge, especially when targeting trophy lake trout that relate to specific underwater structures far from the boat.
| Sonar Type | Beam Shape | Detection Area | Best Use Case | Fish Appearance | Structure Detail |
|---|---|---|---|---|---|
| 2D Sonar | Cone | Directly below boat | General scanning, depth | Arches, lines, dots | Moderate |
| Down Imaging | Thin Fan (Vertical) | Directly below boat | Detailed vertical view of structure | White spots/blobs with shadows | High (photographic) |
| Side Imaging | Thin Fan (Horizontal) | To the sides of boat | Scouting large areas, finding offshore structure | White spots/blobs with shadows | Very High (photographic) |
| CHIRP Sonar | Cone (Range of Freq.) | Directly below boat | Enhanced target separation, clarity | Well-defined arches | Improved over traditional 2D |
Practical Application for Utah's Diverse Reservoirs
Applying your fish finder knowledge to the unique characteristics of Utah's waters is where the rubber meets the road. Each major reservoir presents its own challenges and opportunities, and your fish finder can be your most powerful ally in unlocking their secrets.
Deep Water Strategies at Flaming Gorge and Lake Powell
Fishing the immense, deep waters of Flaming Gorge and Lake Powell demands a thoughtful approach to your fish finder. These reservoirs can be hundreds of feet deep, and fish often suspend or hold to structure at significant depths.
- Flaming Gorge: When targeting trophy lake trout (Mackinaw) or kokanee salmon, you'll want to primarily use lower frequencies for better depth penetration and a wider cone. Lake trout often hold very deep, sometimes 100-200 feet, tight to the bottom or suspended over deep ledges. Look for those massive, strong arches near the bottom. When trolling for kokanee, you'll be scanning the mid-water column for dense bait balls and the distinct arches of kokanee often suspended between 40-80 feet. Downriggers, paired with a good fish finder, are essential here for presenting your lures at the exact depth where you're marking fish. Being able to read the fish finder effectively will directly impact how to troll for kokanee in Utah.
- Lake Powell: Known for its vastness and prolific striped bass, Lake Powell requires extensive scanning. Side imaging is particularly useful here for locating submerged canyons, channels, and especially those immense schools of striped bass that can be spread over large areas. When you find a "boil" on the surface, your fish finder will confirm the depth and density of the school below, often showing a massive cloud of fish extending far into the water column. You'll also use it to find structure for smallmouth and largemouth bass, which often relate to rocky ledges and submerged timber in the coves.
Shallow to Mid-Depth Tactics at Strawberry and Utah Lake
These reservoirs present different challenges, where understanding subtle changes in bottom contour and locating specific types of cover are paramount.
- Strawberry Reservoir: While deep in some areas, much of Strawberry is fished in mid-depths. Here, higher frequency 2D sonar and down imaging shine. You'll be looking for rainbow and cutthroat trout, often suspended or cruising along contours. Pay close attention to subtle drop-offs, humps, and the edges of weed lines where fish ambush prey. When ice fishing at Strawberry, your flasher or fish finder is vital for seeing fish approach your jig in real-time. For a comprehensive guide, check out the Strawberry Reservoir Fishing Guide.
- Utah Lake: This is Utah's largest freshwater lake but is relatively shallow, averaging around 9 feet deep. Walleye, channel catfish, and white bass are the main targets. Here, your fish finder will be critical for finding subtle bottom transitions, old river channels, and structure that might be only a few feet off the bottom. Walleye will often appear as strong marks tight to the bottom, especially near rocky areas or humps. For catfish, you'll be looking for similar bottom-hugging marks, often in slightly muddier areas. Side imaging can be incredibly useful for locating these subtle features over vast, relatively featureless flats. Don't forget to research the Utah Lake Fishing Guide for more specific tips.
River and Stream Applications
While less common for traditional fish finders, some anglers use portable units or even advanced side imaging on drift boats for larger rivers like the Green River below Flaming Gorge Dam or the Provo River.
- Green River/Provo River: In these blue-ribbon trout streams, a fish finder might not be your primary tool for actively locating individual fish in the current. However, on larger sections or from a drift boat, it can be invaluable for mapping depth changes, identifying deep holes, submerged boulders, or log jams that provide prime trout habitat. It helps confirm depths when nymphing or fishing streamers, allowing you to present your flies or lures in the most productive zones. You can also use it to identify how runoff affects Utah river fishing by observing changes in water clarity and depth.
Ultimately, reading a fish finder effectively for Utah reservoirs is an ongoing learning process. It combines understanding the technology, recognizing patterns on the screen, and correlating those patterns with what you actually catch. The more time you spend on the water, experimenting with settings and paying attention to what your screen is telling you, the more proficient you'll become. Tools, fishing line, and even specific types of tackle are readily available at stores or online through platforms like Amazon, but the knowledge to interpret your electronics is something you build over time with practice.
Disclaimer
Please note that fishing regulations and conditions in Utah can change. Always consult the latest Utah Division of Wildlife Resources (UDWR) official guidebooks and regulations before heading out on the water. This information is for general guidance and educational purposes only.