How to Set Up a Slip Bobber Rig
It's incredibly frustrating when you arrive at a promising fishing spot in Utah, only to find your traditional fixed bobber just isn't cutting it. Maybe the fish are suspended deeper than your setup allows, or you can't cast far enough without snagging. This guide is all about equipping you with the knowledge to set up and effectively use a slip bobber rig, ensuring you can hit those precise depths and entice more bites in Utah's diverse waters.
Why the Slip Bobber Rig Reigns Supreme for Utah Anglers
Think about those days on the water when you knew fish were there, but you just couldn't get your bait to them. You tried casting, but your fixed bobber snagged on weeds or wouldn't let your bait reach the bottom in deep water. It's a common scenario for many anglers, and it's precisely where the slip bobber rig shines. It’s not just a different way to rig; it’s a whole new level of control and versatility that can make a huge difference in your success, especially when you're tackling the varied conditions found across Utah's lakes, reservoirs, and rivers.
The Limitations of Fixed Bobbers in Diverse Waters
Let's be honest, fixed bobbers have their place, especially in shallow, uniform depths or for teaching a youngster how to fish in a calm community pond. But when you venture out to the vastness of Strawberry Reservoir or the fluctuating depths of Deer Creek, a fixed bobber quickly becomes a hinderance. Trying to set your bait 15-20 feet deep with a fixed bobber on a standard 7-foot rod is an exercise in futility and frustration. The bobber gets tangled, you can't cast more than a few feet, and you spend more time untangling line than actually fishing. Even in slower rivers like sections of the Provo, if you want your bait to drift naturally along the bottom in a deeper run, a fixed bobber often pulls it up too high or drags awkwardly. It limits your effective fishing depth to roughly your rod length, which simply isn't enough for many of Utah's prime fishing opportunities. This lack of adaptability can lead to missed opportunities, as fish often hold at specific depths, sometimes far below where a fixed bobber can reach.
The Freedom and Precision a Slip Bobber Offers
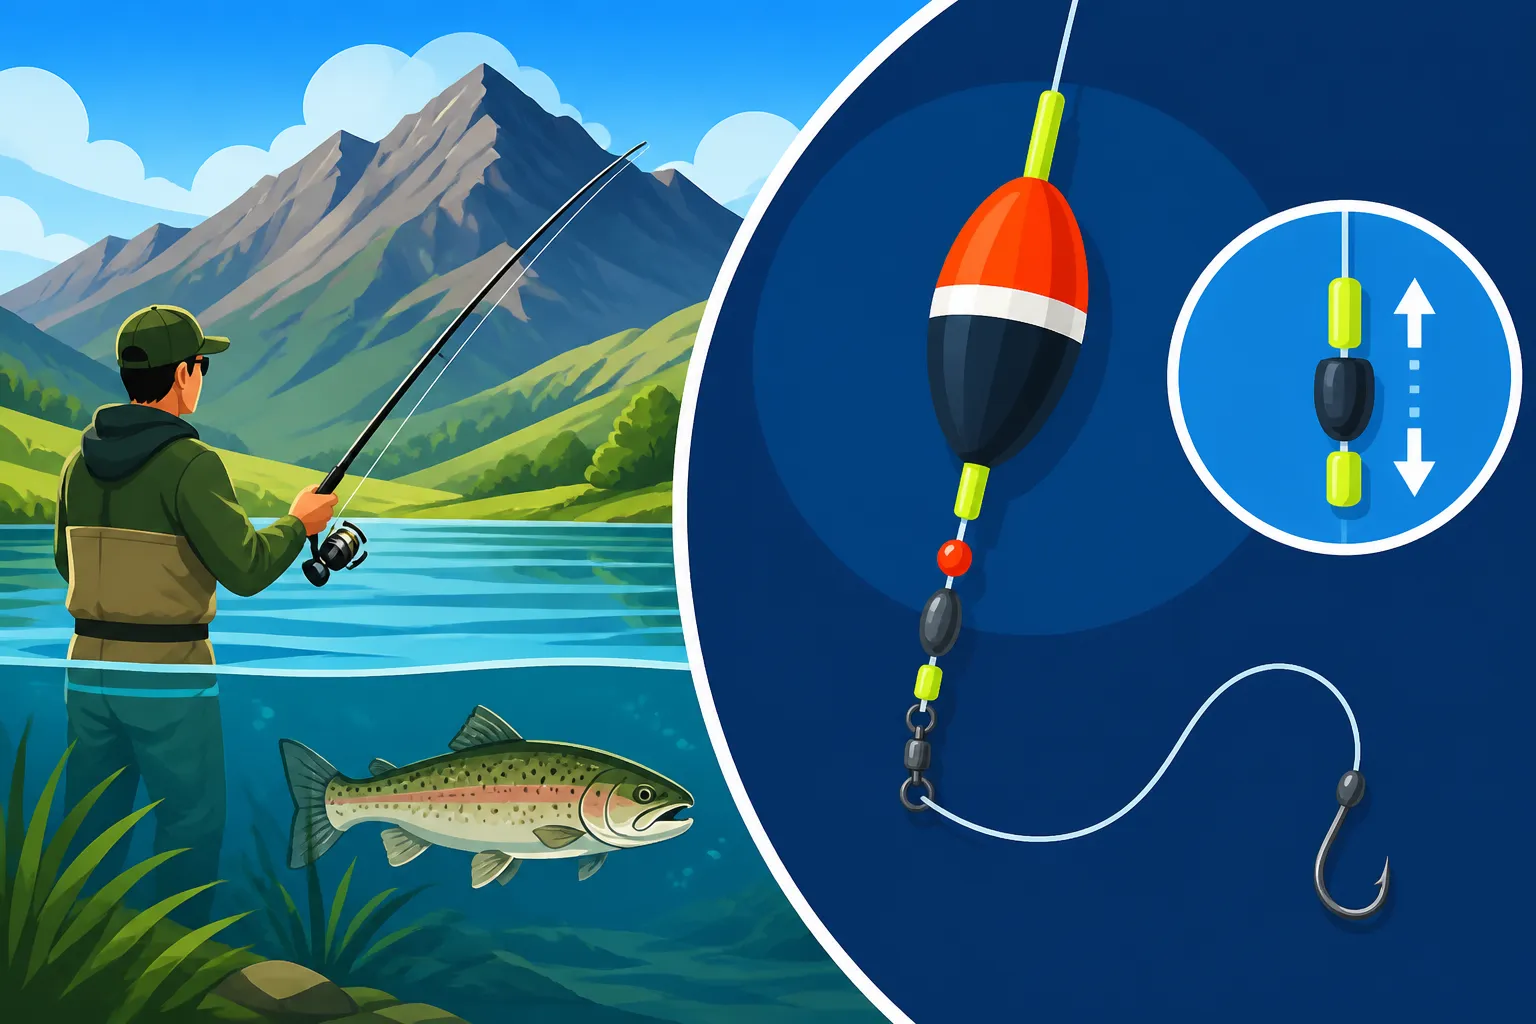
The slip bobber rig is truly a game-changer because it eliminates those depth limitations. The key is its unique design: the bobber itself "slips" freely up and down your fishing line, controlled by a small, adjustable bobber stop knot. This means you can cast your bait as far as you want, and once it hits the water, the weight of your sinker pulls the line through the bobber until it meets that pre-set bobber stop. Suddenly, you can effortlessly fish at 5 feet, 15 feet, or even 30 feet deep with the same ease as fishing 2 feet deep.
This versatility isn't just about depth; it's about precision. Are the trout suspended at 10 feet over a drop-off at Jordanelle? You can hit that exact zone. Are you targeting walleye that are hugging the bottom in Utah Lake in 18 feet of water? No problem. The slip bobber also tends to be more sensitive than many fixed bobbers, telegraphing even the lightest bites with a subtle dip or shudder, which is crucial for finicky fish. It allows for a more natural presentation, letting your bait drift or sink enticingly without the stiff, unnatural pull that a fixed bobber can sometimes impart. For new anglers looking to expand their horizons beyond the bank of a community pond, learning "How to Fish From Shore in Utah" with a slip bobber can open up a world of possibilities.
Deconstructing the Slip Bobber: Essential Components and Assembly
Before you can experience the magic of the slip bobber, you need to understand its individual parts and how they all come together. Don't worry, it's not nearly as complicated as it might sound! Think of it like building with LEGOs; each piece has a purpose, and when connected correctly, they create a functional, fish-catching machine. Many of these components can be found bundled together as kits, or individually, on platforms like Amazon or at your local tackle shop.
Identifying Your Gear: What You'll Need
Gathering all your components beforehand makes the rigging process smooth and quick. Here’s a rundown of what you’ll be needing:
- Bobber Stop: This is arguably the most important piece. It's usually a small piece of thread or a tiny rubber cylinder that you attach to your main line. Its job is to stop the slip bobber at your desired depth. Thread stops are often preferred by experienced anglers because they cast smoother and hold better on light lines, but rubber stops are quick and easy to adjust.
- Plastic Bead: A small plastic or glass bead is essential. It sits between the bobber stop and the slip bobber. The bead prevents the bobber stop, which is typically quite small, from being pulled through the hole in the slip bobber when a fish bites or during a cast.
- Slip Bobber: These come in various shapes and sizes, from slender pencil-style bobbers for light bites to larger, more buoyant models for heavier baits or windy conditions. They all have a hole running through the center, allowing your line to slide freely. Choose a size appropriate for the weight of your bait and the conditions you're fishing.
- Weight (Split Shot or Sinker): You'll need enough weight to get your bait down to depth and help the bobber stand upright. Small split shot weights are common for lighter presentations, while egg sinkers or bullet weights might be used for heavier baits or in current. The amount of weight will also depend on the buoyancy of your chosen bobber.
- Swivel (Optional but Recommended): A small barrel swivel helps prevent line twist, especially if you're using bait that spins. It also provides a clean connection point between your main line and your leader (if you choose to use one).
- Hook or Jig: This is where you'll attach your bait! The size and style will depend entirely on the fish species you're targeting and the bait you're using. For instance, a small baitholder hook for worms, or a tiny jighead for soft plastics.
Here's a quick look at the components:
| Component | Purpose | Considerations |
|---|---|---|
| Bobber Stop | Sets the fishing depth. | Thread stops for smooth casting, rubber stops for easy adjustment. |
| Plastic Bead | Prevents the bobber stop from entering the bobber. | Match size to bobber hole, usually small. |
| Slip Bobber | Floats to indicate bites; slides on the line. | Choose size based on bait weight and desired sensitivity. |
| Weight | Sinks bait to depth; helps bobber stand up. | Split shot for light bait, egg/bullet sinkers for heavier bait/current. |
| Swivel | Prevents line twist; connects main line to leader/hook. | Use small, strong swivels. |
| Hook/Jig | Attaches bait and catches fish. | Size and style depend on target species and bait. |
The Step-by-Step Rigging Process
Once you have all your components, assembling the slip bobber rig is straightforward. Just follow these steps carefully, and you'll have a perfectly functional setup ready for the water.
-
Attach the Bobber Stop: Take your bobber stop (if it's a thread type, it usually comes on a small plastic sleeve). Slide your main fishing line through the wire loop on the sleeve, then slide the bobber stop off the sleeve and onto your main line. Pull both tag ends of the bobber stop thread firmly to cinch it down onto your main line. You want it tight enough not to slip under casting pressure, but loose enough that you can still slide it up and down your line by hand when adjusting depth. Trim the long tag ends, leaving about a quarter-inch so you can still grab them for adjustment. For optimal strength and security, it's wise to ensure your main line, whether monofilament or braid, is appropriate for the species you're targeting. For trout, knowing the "Best Fishing Line for Utah Trout" can make a big difference.
-
Slide on the Bead: Immediately after the bobber stop, slide one of your plastic beads onto your main line. This bead will rest against your bobber stop, providing a larger surface for the bobber to push against, preventing the small knot of the bobber stop from pulling through the bobber's hole.
-
Add the Slip Bobber: Now, thread your main line through the center hole of your slip bobber. The line should go in one end and out the other, allowing the bobber to slide freely along the line.
-
Connect Your Terminal Tackle: This is where you connect your weight, swivel, and hook.
- Option 1 (Using a Swivel): If you're using a swivel, tie your main line to one end of the swivel using a strong knot like a Palomar or improved clinch knot. Then, attach your leader (a shorter piece of line, often lighter test or fluorocarbon for stealth) to the other end of the swivel. Tie your hook or jig to the end of the leader. This setup helps prevent line twist and makes changing hooks easier. Learning "How to Tie a Basic Fishing Knot for Trout Fishing" will come in handy here.
- Option 2 (Direct to Hook/Jig): For a simpler setup, you can skip the swivel and leader. Directly tie your main line to your hook or jig. This is often done for very light presentations or when fishing shallow with minimal current.
-
Add Your Weight: Pinch one or more split shot weights onto your line a few inches above your hook or jig. Alternatively, if using an egg sinker, thread it onto your line above the swivel, allowing it to slide freely down to the swivel. You need enough weight to allow your bait to sink and to make your bobber stand upright in the water, but not so much that it pulls the bobber completely under. Experimentation is key here to find the balance between sinking your bait quickly and maintaining bobber sensitivity.
With these steps complete, your slip bobber rig is assembled and ready for action! The next step is to learn how to adjust it to the specific conditions you're facing on the water.
Mastering Depth and Presentation for Utah's Fish Species
Having your slip bobber rig assembled is just the first step. The true mastery comes from understanding how to manipulate its depth and combine it with the right bait to entice a bite. Utah's diverse fisheries, from the stocked trout ponds to the deep reservoirs holding walleye and bass, demand adaptability. The beauty of the slip bobber is how easily it lets you make those crucial adjustments, putting your bait exactly where the fish are holding.
Adjusting Your Depth for Optimal Strikes
One of the greatest advantages of a slip bobber rig is the ability to quickly and easily adjust your fishing depth. This is done by simply sliding the bobber stop knot up or down your main line.
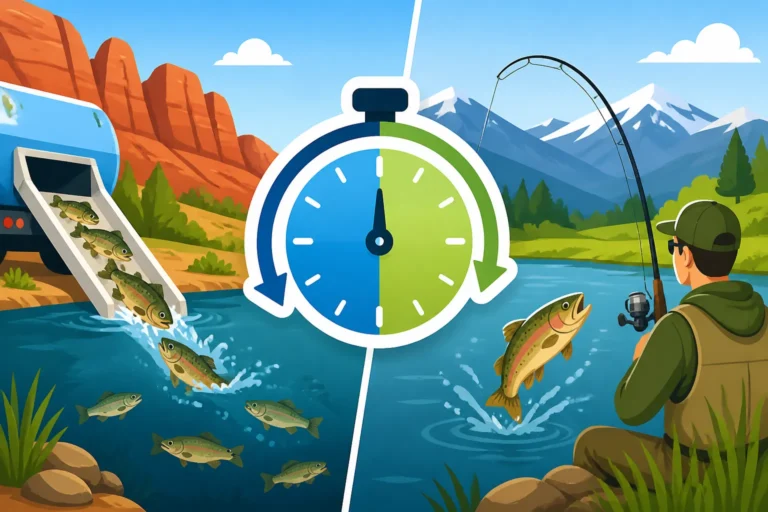
- Shallow Water/Stocked Ponds: If you're fishing a community pond for recently stocked rainbow trout, they often cruise closer to the bottom or just a few feet down. You might start by setting your bobber stop to a depth of 3 to 5 feet. For more tips on this, check out "How to Fish a Utah Community Pond After a Stocking Truck Visit". You'll want to experiment; if you're not getting bites, try moving the bobber stop up or down a foot at a time until you find the fish.
- Deeper Reservoirs/Suspended Fish: When targeting species like kokanee salmon or even larger lake trout at places like Flaming Gorge, they might be suspended in the water column, perhaps 15, 20, or even 30 feet deep. The slip bobber allows you to easily set your depth to these deeper zones without struggling to cast. The weight carries your bait down, and the bobber rises to meet the stop, suspending your bait precisely where you want it. This is especially useful when fish are holding over submerged structure or in particular temperature bands.
- River Currents: Even in slower river sections like the Provo River, a slip bobber can be effective. You can set it so your bait lightly bounces along the bottom, or just above it, allowing for a natural drift with the current. This often means setting your bobber stop to a depth slightly less than the actual depth of the water, allowing the current to sweep your bait naturally. Pay attention to the speed of your drift; sometimes a slightly shallower setting will allow your bait to 'tumble' more naturally.
The key is constant experimentation. Fish rarely stay at one exact depth all day. Conditions like light, temperature, and even boat traffic can influence where they hold. Don't be afraid to try different depths until you start getting bites; that bobber stop is your best friend for this.
Choosing the Right Bait and Weight Combination
The effectiveness of your slip bobber rig is also heavily influenced by the bait and weight you choose. These elements dictate how your bait sinks, how it presents itself, and ultimately, whether a fish decides to take a closer look.
- Bait Selection:
- Live Bait: Worms (nightcrawlers, red wigglers), mealworms, or even legal minnows (check local regulations carefully, as "Utah Bait Fish Rules for Live Bait" can vary by water) are fantastic with a slip bobber. The natural movement of live bait is often irresistible. Hook worms once or twice to allow them to wriggle enticingly.
- Dough Baits: PowerBait is a staple for trout in Utah's stocked waters. Mold a small ball around your hook, and the buoyancy will lift it slightly off the bottom, making it more visible. Knowing "What Color PowerBait Works Best in Utah Reservoirs?" can give you an edge. Corn is another effective, inexpensive option for panfish and trout in community ponds.
- Small Jigs/Soft Plastics: Tiny jigs tipped with a grub or a piece of Gulp! bait can be fished effectively under a slip bobber, especially for crappie, bluegill, or even trout. The bobber suspends the jig, and slight twitches of your rod tip can impart subtle action. You can discover more options for your tackle box by exploring "Best Lures for a Utah Tackle Box".
- Weight Considerations:
- Split Shot: These are small, round lead (or non-toxic alternative) weights that you pinch onto your line. They are versatile and easy to add or remove. For lighter baits, a single split shot might be enough. For worms, several small split shots spaced a few inches apart can give a more natural, slower fall.
- Egg Sinkers/Bullet Weights: These are heavier and are often used for fishing deeper, in stronger currents, or with larger baits. They are usually threaded onto the main line above a swivel, allowing the line to slide through them before hitting the bobber stop. This means when a fish takes the bait, it feels less resistance from the weight.
- Bobber Buoyancy: The goal with your weight is to balance it with your bobber's buoyancy. You want just enough weight to make your bobber stand upright, with only the tip showing. This provides the most sensitivity to a bite. If your bobber is lying flat or is pulled completely under without a bite, you either have too little or too much weight, respectively.
Experiment with different bait and weight combinations based on what the fish are feeding on and the water conditions. A natural presentation is almost always more effective.
Reading the Bite and Setting the Hook
One of the most exciting aspects of slip bobber fishing is watching that bobber for a bite. Because of its sensitivity and design, a slip bobber often gives clear indications that a fish is interested, but understanding what those signals mean is key to a successful hookset.
- Subtle Nudges: Sometimes, especially with larger fish or when they're just sampling the bait, you'll see the bobber give a slight twitch, a small dip, or a gentle pull to the side. These are often preliminary bites, and the fish might still be mouthing the bait. Be patient, but be ready.
- The Disappearing Act: The most satisfying bite is when your bobber simply disappears below the surface, or quickly pulls horizontally across the water. This usually means a fish has taken the bait and is moving away with it. This is your cue to set the hook!
- Setting the Hook: When you see a definitive bite, reel up any slack in your line until you feel resistance, then quickly and firmly lift your rod tip upward and slightly to the side. Avoid a huge, exaggerated sweep, especially with lighter lines and smaller hooks, as you can pull the bait right out of the fish's mouth. A smooth, controlled snap of the wrist is usually sufficient. Remember, a good hookset is critical, and there are specific techniques for "How to Set the Hook on a Soft Bite From Trout" that can really improve your landing rate. The best time of day for trout fishing can often coincide with light bites, making your slip bobber's sensitivity crucial. Explore "Best Time of Day to Fish for Utah Trout" for more insights.
Learning to read the bobber takes practice. Pay attention to how the wind and current affect its movement, so you can differentiate those natural movements from the subtle indications of a fish. The more you watch, the better you'll become at recognizing a true bite.
Advanced Strategies and Troubleshooting for Slip Bobber Success
The slip bobber rig is incredibly versatile, but like any fishing technique, there are specific scenarios where it truly shines and common pitfalls to avoid. Understanding these nuances will elevate your slip bobber game, helping you adapt to Utah's diverse fishing challenges and troubleshoot issues when they arise. Mastering these strategies can lead to more consistent success, whether you're targeting trout, bass, or panfish. For a broader overview of fishing methods, take a look at our "Utah Fishing Techniques for Beginners" guide.
When to Reach for Your Slip Bobber Rig
While a slip bobber is a fantastic all-around tool, it's particularly effective in certain situations. Knowing when to deploy it can significantly increase your chances of success.
- Still Waters with Variable Depths: This is the slip bobber's bread and butter. Lakes and reservoirs like Willard Bay, Pineview Reservoir, or even the calm sections of bigger bodies like Lake Powell often have areas where fish are suspended at different depths throughout the day or prefer to hold over submerged structure that's too deep for a fixed bobber. A slip bobber allows you to quickly adjust from fishing 5 feet deep near a weed line to 20 feet deep over a channel. This adaptability is crucial when the fish are constantly moving or you're exploring new waters.
- Light Current and Natural Drifts: In rivers with a gentle flow, or even shorelines of large reservoirs where subtle currents exist, a slip bobber allows your bait to drift more naturally. Unlike a fixed bobber which can cause your bait to swing in an arc, a slip bobber lets the weight and bait fall relatively straight down, then drift at a controlled depth. This natural presentation is often irresistible to wary fish like brown trout in the Weber River or rainbow trout in sections of the Logan River.
- Targeting Suspended Fish: Many species, especially kokanee salmon, crappie, and even some trout, spend their time suspended in the water column, not necessarily on the bottom or near the surface. A fish finder might show you schools of fish at a particular depth. The slip bobber is the perfect tool to precisely place your bait within those schools, maximizing your chances. This is also why they are so popular for "Utah Ice Fishing Guide", as they allow you to set your bait exactly at the depth where fish are congregating under the ice.
- Fishing Over Submerged Structure: If you've located a submerged rock pile, brush pile, or old creek bed using your sonar, a slip bobber allows you to present your bait just above that structure without getting snagged. You can set the bobber stop a foot or two shallower than the structure's top, ensuring your bait hovers enticingly for predatory fish like bass or walleye waiting in ambush.
Common Pitfalls and How to Avoid Them
Even with the best intentions, you might run into some common issues with your slip bobber rig. Don't get discouraged! Most problems are easily fixable with a little know-how.
- Bobber Stop Slipping: This is perhaps the most frequent issue. If your bobber stop isn't cinched down tightly enough, it can slip, causing your bait to fall deeper than intended. The fix? Make sure you pull both tag ends of the thread stop very firmly when you first tie it on. If it's still slipping, try adding a second bobber stop knot a few inches below the first (above the bead) as a backup. Sometimes, very thin diameter braided lines can be prone to this, so opting for a slightly thicker monofilament or fluorocarbon leader where the bobber stop sits can help.
- Line Tangles During Casting: Long leaders, too much slack line, or windy conditions can cause tangles. Ensure your leader isn't excessively long for your rod (typically 1-3 feet is good). Before casting, make sure there's no slack in your line below the bobber. A smooth, controlled cast is always better than a hard, jerky one. Consider adding a small swivel just above your hook or jig to help mitigate line twist, especially if you are using rotating baits or fishing with heavy current.
- Using Too Much or Too Little Weight: If your bobber lies flat on the water, you likely don't have enough weight to pull the line through the bobber and stand it up. Add more split shot until only the tip of the bobber is showing. If your bobber is pulled completely under without a bite, you have too much weight; remove some until it floats properly. The goal is neutral buoyancy with just the tip showing for maximum sensitivity. Sometimes, the right amount of weight depends on the bobber you selected from places like Amazon.
- Bobber is Too Large for the Bait: A bobber that's too buoyant for your light bait will not show bites effectively. Even a fish mouthing the bait might not be able to pull a large bobber down. Match the size and buoyancy of your slip bobber to the weight of your bait. For light presentations, choose a smaller, more slender bobber. This is a critical piece of "Utah Fishing Gear Guide" advice that often gets overlooked.
- Snagging on the Bottom: If you're consistently getting snagged, your depth is set too deep. Reel in, slide your bobber stop up your line a foot or two, and try again. Sometimes, fish are holding just above the snags, and a slight adjustment can make all the difference. For specific strategies on "Utah Trout Fishing Tips" when fishing near structure, proper depth adjustment is key.
By being aware of these common issues and knowing how to address them, you'll spend less time troubleshooting and more time enjoying the beautiful fishing opportunities Utah has to offer. With a little practice, the slip bobber rig will become a go-to technique in your angling arsenal.
Disclaimer
This article is for general informational purposes only and does not constitute professional advice. Laws, prices and regulations vary by location and change over time. Consult a qualified professional for guidance on your specific situation.