How to Tie a Basic Fishing Knot for Trout Fishing
There's nothing quite as deflating as feeling that tell-tale tug, battling a beautiful Utah trout, only for your line to go slack right at the net. More often than not, the culprit isn't the fish's cunning or your technique, but a poorly tied knot. It's a frustrating experience many anglers face, but learning to tie a few fundamental knots reliably can dramatically improve your success and confidence on the water. This guide will walk you through the basic, yet incredibly strong, knots you need for successful trout fishing in Utah, helping you land more fish and less heartache.
Why a Strong, Reliable Knot is Your Best Friend in Utah Trout Fishing
When you're out on the water, whether it's the swift currents of the Green River below Flaming Gorge or the expansive depths of Strawberry Reservoir, your knot is the single point of failure connecting you to your prized catch. A weak or improperly tied knot can unravel, slip, or simply snap under the strain of a feisty trout, leaving you with just a story about "the one that got away." Utah's diverse trout species, from the hard-fighting rainbow trout in community ponds to the larger, more powerful brown trout in rivers and reservoirs, demand tackle that can stand up to their spirited runs and head shakes.
Think about it: you've spent time researching the best fishing spots in Utah, carefully selected your bait or lure, and patiently waited for a bite. All that effort can be undone in an instant by a faulty knot. It's not just about strength; it's about confidence. When you know your knot is tied correctly, you can focus on the thrill of the fight, rather than worrying if your line will hold. This peace of mind is invaluable, especially when you hook into a true trophy fish that tests every inch of your gear.
The Dynamics of a Trout Fight and Knot Integrity
Trout are known for their lively fights. A rainbow trout might jump and thrash, while a brown trout often makes powerful, deep runs. These actions put immense stress on your fishing line and, most critically, on the knot connecting your hook or lure to your leader. The sudden jerks and changes in direction can cause friction and wear on a knot that isn't snug or properly formed. Even a small imperfection can lead to slippage, especially with monofilament lines.
Consider the varying water conditions too. In clear mountain streams, the presentation needs to be perfect, and a knot that doesn't lay right can affect the lure's action. In windy reservoir conditions, casting accuracy and distance are key, and a smooth, compact knot minimizes tangles and allows for longer, more precise casts. Mastering a few strong knots means you're prepared for whatever Utah's waters throw at you, ensuring that when you get that exhilarating bite, you have the best chance of bringing it to the net.
The Improved Clinch Knot: A Workhorse for Trout Anglers
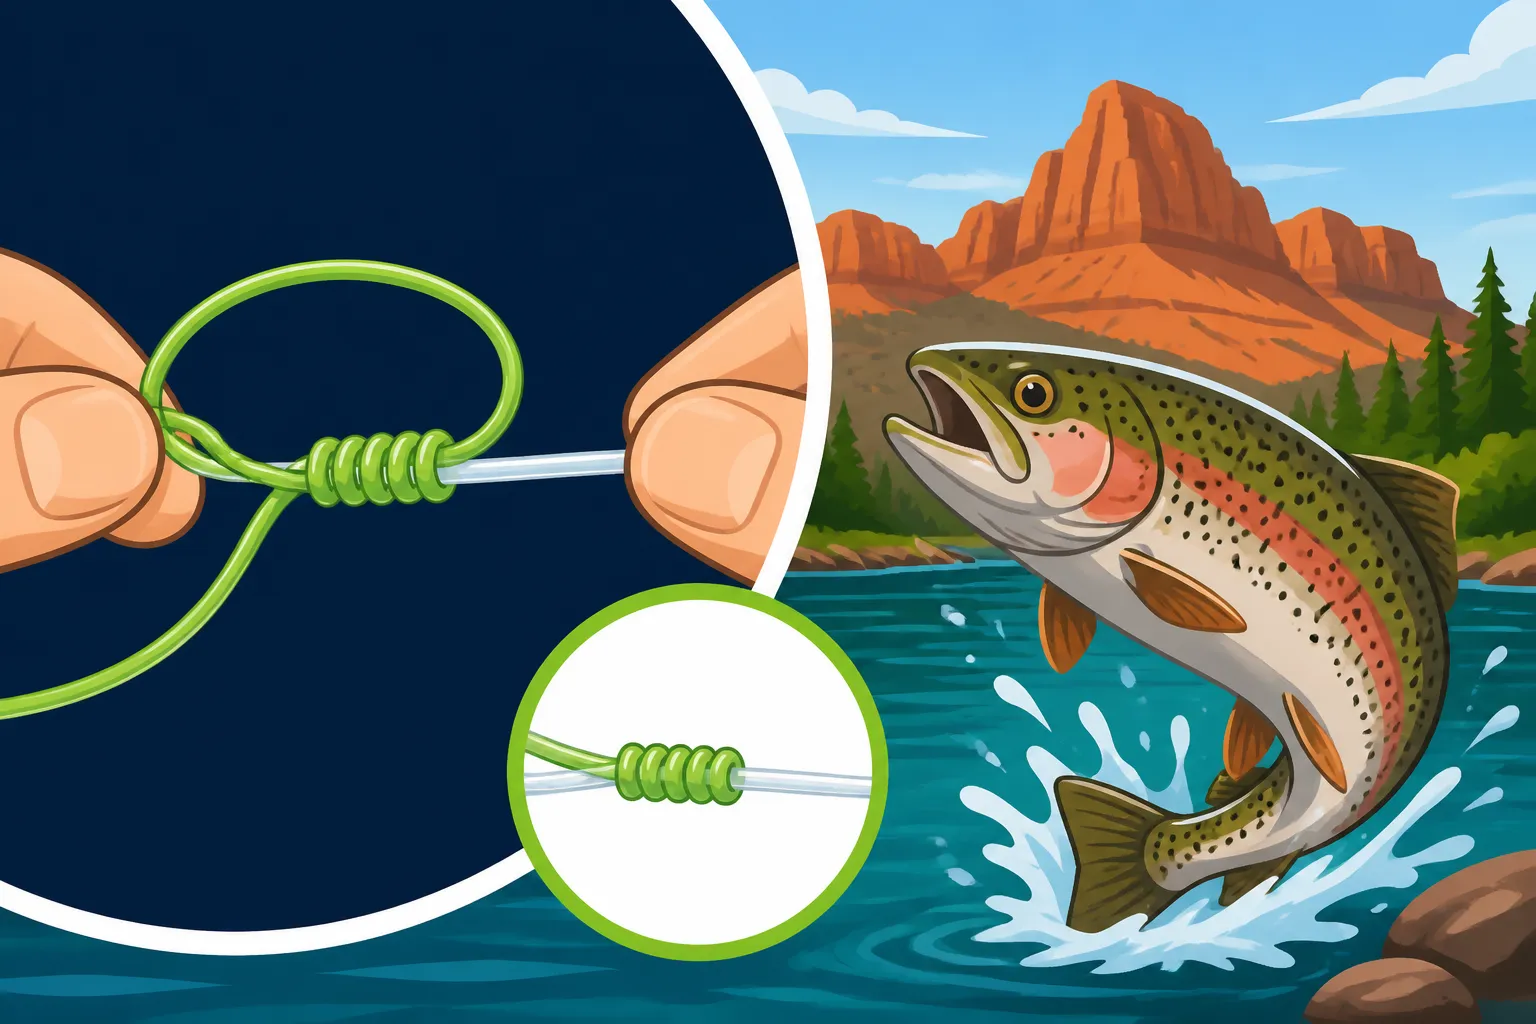
The Improved Clinch Knot is arguably one of the most widely used and reliable knots for tying a hook, swivel, or lure to a fishing line, making it a must-know for anyone targeting trout in Utah. It's relatively easy to learn, holds strong, and provides good knot strength with most monofilament and fluorocarbon lines. This knot creates a secure connection that can withstand the head shakes and runs of a spirited trout.
When you're rigging up your rod for a day of fishing at Deer Creek Reservoir, perhaps using PowerBait for stocked trout or a small lure for some aggressive smallmouth bass, the Improved Clinch Knot is your reliable friend. It’s also an excellent choice when considering what size hook should you use for Utah stocked trout, ensuring that whatever hook you choose, it stays securely attached.
Step-by-Step Guide to Tying the Improved Clinch Knot
Let's break down how to tie this essential knot. It might seem tricky at first, but with a little practice, it'll become second nature. You can even find practice line or knot-tying tools on Amazon to help get the muscle memory down.
- Pass the Line Through the Eye: Start by passing the tag end of your fishing line through the eye of your hook, swivel, or lure. If you're using heavier line, you might want to double it and pass it through the eye twice for extra security.
- Twist the Line: Bring the tag end back alongside the main line, and wrap it around the main line about 5-7 times. For lighter lines (like 4-6 lb test, common for trout fishing), more wraps are better. For heavier lines, 5 wraps are usually sufficient. Make sure these wraps are snug and even.
- Insert the Tag End: Now, take the tag end and pass it back through the small loop you created just above the eye of the hook. This is the first "clinch" part.
- Form the Second Loop: Crucially, for the improved clinch, after passing through that first loop, bring the tag end back through the larger loop that was formed by the twists. This creates the "improved" aspect, locking the knot down more securely.
- Moisten and Tighten: Moisten the knot with a little saliva. This is a critical step as it lubricates the line, preventing friction heat build-up that can weaken the line as you tighten the knot. Slowly pull the main line to draw the wraps down, then pull the tag end and the main line simultaneously to cinch the knot tightly against the eye.
- Trim Excess: Once the knot is tight and neat, trim the tag end, leaving a small stub (about 1/8 inch) to ensure it doesn't slip.
Common Mistakes and How to Avoid Them
Even experienced anglers can make mistakes with the Improved Clinch. The most common error is not moistening the knot before tightening. Without lubrication, the friction can "burn" the line, causing microscopic damage that severely weakens the knot, making it prone to breaking under stress. Another mistake is not doing enough wraps or making uneven wraps, which can compromise the knot's integrity. Always ensure your wraps are neat and tight, and that you've completed both passes for the "improved" version. A poorly tied knot can be the difference between landing a nice cutthroat and watching your lure disappear into the depths.
The Palomar Knot: Superior Strength for Lures and Braided Line
While the Improved Clinch Knot is fantastic, the Palomar Knot stands out for its incredible strength and simplicity, especially when dealing with braided lines or tying on lures and swivels where maximum strength is paramount. It's often cited as one of the strongest fishing knots available, retaining a very high percentage of the line's breaking strength. This makes it an excellent choice for a wide variety of fishing applications, from targeting the elusive tiger muskie at Pineview Reservoir to casting crankbaits for smallmouth bass at Flaming Gorge.
If you're using braided line, which is becoming increasingly popular due to its sensitivity and strength, the Palomar Knot is often the go-to. Unlike mono or fluoro, braided line can be slippery, and some knots don't hold well. The Palomar's unique structure cinches down securely on itself, making it highly resistant to slippage.
Tying the Palomar Knot: A Visual Guide in Your Mind
The Palomar might look a bit different from other knots, but once you get the hang of it, you'll be tying it in seconds. This knot is particularly beneficial for anglers who are working with sensitive gear. For instance, if you're selecting the best fishing line for Utah trout, and you opt for a thin, strong braided line, the Palomar will maintain its integrity.
- Double the Line and Pass Through the Eye: Start by doubling about 6-8 inches of your fishing line and pass the doubled loop through the eye of your hook, swivel, or lure. This is the most distinctive step of the Palomar.
- Tie a Simple Overhand Knot: With the doubled line, tie a loose overhand knot around the main line. It should look like you're starting to tie your shoelace. Make sure the hook or lure hangs freely in the middle of this loop.
- Pass the Loop Over the Hook: Now, take the doubled loop you just created and pass it over the entire hook, lure, or swivel. This can seem a bit awkward, especially with larger lures, but it's essential for the knot to form correctly.
- Moisten and Cinch: Moisten the line with saliva, then pull both ends of the main line slowly and steadily. The loop you passed over the hook will slide down and cinch tightly around the eye of the hook. Keep pulling until it's snug and neat.
- Trim Excess: Just like with the Improved Clinch, trim the tag end, leaving a small stub.
When to Choose the Palomar Over the Clinch
While both knots are excellent, there are times one shines brighter. The Palomar is generally preferred for:
- Braided Line: Its design handles the slippery nature of braided line much better than many other knots.
- Lures and Heavy Tackle: When you need absolute maximum strength for aggressive fish or heavy lures, the Palomar often offers a higher breaking strength percentage. If you're wondering how to rig a jig for Utah trout, the Palomar provides a very direct, strong connection to your jig.
- Quick Tying (with practice): Once mastered, many anglers find the Palomar quicker to tie, especially in cold weather or low light, because it involves fewer wraps and passes.
However, it can be a bit more challenging to pass the large loop over a particularly large or oddly shaped lure. For very small hooks or flies, the Improved Clinch might feel a bit more nimble.
Knot Comparison Table
To help you decide which knot to use, here's a quick comparison of the Improved Clinch and Palomar knots:
| Feature | Improved Clinch Knot | Palomar Knot |
|---|---|---|
| Ease of Tying | Moderate, requires careful wraps and two passes. | Moderate, requires passing loop over hook. |
| Strength | Very good (retains 85-95% of line strength). | Excellent (retains 95-100% of line strength). |
| Best For | Monofilament, fluorocarbon, hooks, swivels, small lures. | Braided line, heavy monofilament/fluorocarbon, lures, swivels. |
| Common Issues | Not moistening, uneven wraps, not completing "improved" pass. | Not passing loop completely over hook, can be bulky for tiny eyes. |
| Versatility | Highly versatile for general purpose fishing. | Ideal for situations demanding maximum knot integrity. |
Practice Makes Perfect and On-Water Confidence
Learning to tie knots isn't just a one-time thing; it's a skill that improves with consistent practice. The more you tie them, the faster and more reliable you'll become, which is crucial when you're out on the water, battling wind, cold fingers, or the excitement of a hot bite. Don't wait until you're riverside at the Provo River with a hungry trout on the line to try tying a new knot!
Many anglers find it helpful to carry a small knot-tying tool, available on Amazon, or even just a large blunt needle and some thick string at home. This allows you to practice in a relaxed environment until the steps become muscle memory. When you can tie these knots without looking, you'll feel a huge boost in confidence, which translates directly to more successful fishing trips.
Pre-Trip Knot Checks and On-the-Water Adjustments
Before every fishing trip, make it a habit to check all your knots. This means examining the knots where your line meets your reel, where your leader connects to your main line (if applicable), and especially the knot connecting your hook or lure. Look for any signs of fraying, loose wraps, or nicks in the line. Even small imperfections can be exacerbated by casting and retrieving. It's much better to re-tie a knot at home than to lose a fish because of it.
On the water, if you experience a snag, a particularly hard fight, or even if your lure takes a few hits off the bottom, it's wise to quickly inspect your knot. Abrasion from rocks, teeth, or even just repeated casting can weaken the line near the knot. If in doubt, cut off a few inches of line and re-tie. It takes only a moment, and that moment could save you a trophy fish. This meticulous approach is part of what separates consistent anglers from those who frequently get frustrated. Remember, when you're learning how to set the hook on a soft bite from trout, a solid knot ensures that energy transfers effectively to the hook, not into knot slippage.
Essential Gear for Reliable Knot Tying
Having the right basic fishing gear can make knot tying easier and more effective. For example, a good pair of fishing pliers or line clippers will allow you to trim your tag ends cleanly and precisely. A jagged cut can snag on guides or collect debris, potentially weakening your line over time. Investing in a quality pair of needle-nose pliers with integrated cutters, often available on Amazon, is a game-changer for many anglers.
Also, consider the best fishing rod size for Utah trout. A rod that matches your line and target species will cast better and put less undue stress on your knots. And as you become more confident with your knots, you might even consider exploring how to tie a basic fishing knot for trout fishing that's slightly more advanced for specific applications. But for now, mastering the Improved Clinch and Palomar knots will set you up for success across most Utah fishing scenarios, helping you spend less time re-tying and more time reeling in those beautiful fish!
Disclaimer
This article is for general informational purposes only and does not constitute professional advice. Laws, prices and regulations vary by location and change over time. Consult a qualified professional for guidance on your specific situation.