How to Sharpen an Ice Auger Blade
There's nothing quite as soul-crushing on a crisp Utah winter morning as setting up your ice fishing shelter, eager to drop a line, only to have your ice auger refuse to cut through the ice. That frustrating grind, the excessive effort, the slipping and sliding – it's a surefire way to dampen your spirits before you've even had your first bite. A dull auger blade isn't just an inconvenience; it's a safety hazard and a massive energy drain. This guide is here to walk you through exactly how to restore that razor-sharp edge to your ice auger blades, making your next Utah Ice Fishing Guide adventure smooth and successful.
Why a Sharp Auger Blade Matters for Utah Ice Fishing
Before we dive into the nitty-gritty of sharpening, let's take a moment to truly appreciate why a keen edge on your auger blades is non-negotiable for a good day out on the ice. It's about more than just convenience; it’s about efficiency, safety, and ultimately, your enjoyment.
The Frustration of a Dull Blade
Picture this: you've driven hours to a prime spot on Strawberry Reservoir, the sun is just starting to peek over the mountains, and you're ready to drill your first hole. You start your auger, push down, and… nothing. Or worse, it starts to cut, but it's a slow, agonizing process. Instead of a smooth, clean cut, you get a grinding, chattering mess. You're expending twice the effort, leaning into the auger with all your weight, your back aching before you've even found the fish. It's enough to make you want to pack up and head home for a warm cup of hot chocolate, and honestly, who could blame you? A dull blade just makes the whole experience a chore rather than the serene pursuit we all love. It wastes precious fishing time and, let's be real, it can really test your patience.
Safety First: Sharp Blades Are Safer
Beyond the sheer frustration, there's a serious safety aspect to consider. A dull blade requires significantly more force to push through the ice. This increased downward pressure and the resulting resistance can lead to the auger binding, kicking back, or slipping unexpectedly. Imagine trying to force a dull blade through thick ice, and it suddenly catches, twisting your body or throwing you off balance. That's how injuries happen – sprained wrists, twisted ankles, or even worse falls on slippery ice. A sharp blade, on the other hand, bites into the ice cleanly and efficiently with minimal effort. This gives you far greater control over the auger, reducing the risk of a dangerous slip or kickback. When you're out on the ice, especially in remote areas, avoiding preventable accidents is paramount. Making sure your blades are sharp is a simple but critical step in ensuring your safety.
Understanding Your Ice Auger Blade
Before you grab a file and start grinding away, it’s helpful to understand the different types of blades and what causes them to lose their edge. Not all auger blades are created equal, and knowing yours will help you sharpen it effectively.
Different Blade Designs
Ice augers generally come with one of two main blade types: chipper blades or shaver (or planer) blades.
- Chipper blades are typically found on older or less expensive augers. They have a more aggressive, serrated edge designed to chip away at the ice. They're robust and can handle dirty ice, but they don't produce as smooth a cut and require more force than shaver blades. Sharpening these often involves a specific file to maintain the serrations.
- Shaver blades (also known as planer blades) are more common on modern, high-performance augers, including many electric and gas models. These blades are designed to shave off thin layers of ice, providing a much smoother, faster cut with less effort. They are often made of harder steel and have a very precise, flat or slightly curved cutting edge. These require a more careful and precise sharpening technique to maintain their critical cutting angle. Some blades also have a distinct "lead" edge that starts the cut, followed by a primary cutting edge. Understanding these nuances on your specific auger is key.
What Makes a Blade Dull?
It seems obvious, right? Cutting ice makes blades dull. But there's more to it than just friction.
- Regular Use: Over time, the constant friction of cutting through hundreds of inches of ice will naturally wear down the sharp edge, causing it to become rounded and less effective.
- Sand and Dirt: This is a big one in Utah, especially on lakes where water levels fluctuate. If your auger blades come into contact with sand, dirt, rocks, or even small pebbles embedded in the ice, they can quickly chip, nick, or dull the edge significantly. This is particularly true if you're augering too close to the bottom of a shallow area or if the ice has frozen over muddy banks. Even a slight scrape can ruin an otherwise perfect edge.
- Rust and Corrosion: Storing blades wet or improperly can lead to rust, which can pit the metal and degrade the cutting edge. Always ensure your blades are dry before storage and consider applying a light coat of oil for long-term protection.
- Improper Handling: Dropping your auger, letting the blades hit concrete, or even just carelessly bumping them against other gear can cause nicks and bends that will severely impact performance. Protecting your blades with a proper guard when not in use is vital.
Gathering Your Sharpening Tools
You can't sharpen a blade with good intentions alone! Having the right tools for the job is crucial. Don't skimp on quality here; cheap tools can do more harm than good to your precision blades.
Essential Sharpening Kit
For most auger blades, especially the common shaver types, you'll need a few key items:
- Flat File: A good quality, fine-toothed flat file is essential for removing nicks and establishing the initial bevel. Look for one with a comfortable handle.
- Sharpening Stone (or Diamond Plate): This is where the magic happens. A medium-grit stone will refine the edge, and a fine-grit stone or diamond plate will polish it to razor sharpness. Diamond plates are often preferred for their durability and consistent abrasive surface, especially when dealing with hardened steel blades.
- Blade Clamp or Vise: Absolutely critical for safety and precision. You must securely hold the blade in place while sharpening. Trying to hold it by hand is a recipe for disaster and an uneven edge.
- Safety Gloves: Heavy-duty, cut-resistant gloves are a non-negotiable item. These blades are incredibly sharp when new, and they will be even sharper after you work on them. Protect your hands!
- Permanent Marker: Useful for marking the bevel to ensure consistent sharpening.
- Eye Protection: Always wear safety glasses or goggles to protect your eyes from metal shavings.
Where to Find Quality Sharpening Tools
You don't need to break the bank, but investing in decent tools will save you frustration and yield better results. You can find excellent sharpening files and stones at most hardware stores or outdoor recreation retailers. For specialized diamond sharpening plates or auger-specific blade sharpeners, places like Bass Pro Shops or online platforms like Amazon offer a wide selection. When shopping, read reviews and look for brands known for their quality abrasives. Remember, a sharpening stone isn't a one-time purchase; it's an investment that will last for years if cared for properly.
Step-by-Step Guide to Sharpening Your Auger Blades
Alright, let's get down to business. This is where we transform those dull, frustrating blades into ice-slicing machines. Take your time, be patient, and prioritize safety above all else.
Safety Precautions Before You Start
Before you even touch your auger, let's talk safety. This isn't a suggestion; it's a command.
- Wear Gloves: As mentioned, cut-resistant gloves are a must. These blades are incredibly sharp, and one slip can lead to a serious injury.
- Secure Your Workpiece: Always use a sturdy vise or a dedicated blade clamp to hold the auger blade securely. Never try to hold it by hand while sharpening. A wobbly blade is dangerous and will result in a poor edge.
- Eye Protection: Metal shavings and sparks (if using power tools, though we're focusing on hand sharpening here) are no joke. Protect your eyes with safety glasses.
- Clear Workspace: Make sure your sharpening area is clean, well-lit, and free of clutter. You need to focus entirely on the task at hand.
- Remove Power Source: If you have a gas or electric auger, always remove the spark plug wire (gas) or disconnect the battery (electric) before handling the auger head or blades. This prevents any accidental starts.
Removing the Blades
Most auger blades are attached with bolts or screws. The exact process might vary slightly depending on your auger's make and model (e.g., StrikeMaster, Eskimo, Jiffy), but the general idea is the same:
- Locate Fasteners: Identify the bolts or screws holding the blades to the auger shaft.
- Use the Right Tool: Grab the appropriate wrench or screwdriver. Often, these are metric sizes, so have a set handy.
- Support the Blades: As you loosen the fasteners, be mindful that the blades might shift or fall. Keep them steady.
- Carefully Remove: Once loosened, carefully remove the blades. Pay attention to how they were positioned – some blades are designed to be installed in a specific orientation, and mixing them up or installing them backward will prevent your auger from cutting effectively. It's often a good idea to mark them (e.g., "left" and "right" if applicable) or take a photo before removal.
- Clean Blades: Once removed, give the blades a good cleaning to remove any ice, dirt, or rust. Use a stiff brush and some water, then dry them thoroughly.
The Sharpening Process
This is the most critical part. Precision and consistency are key.
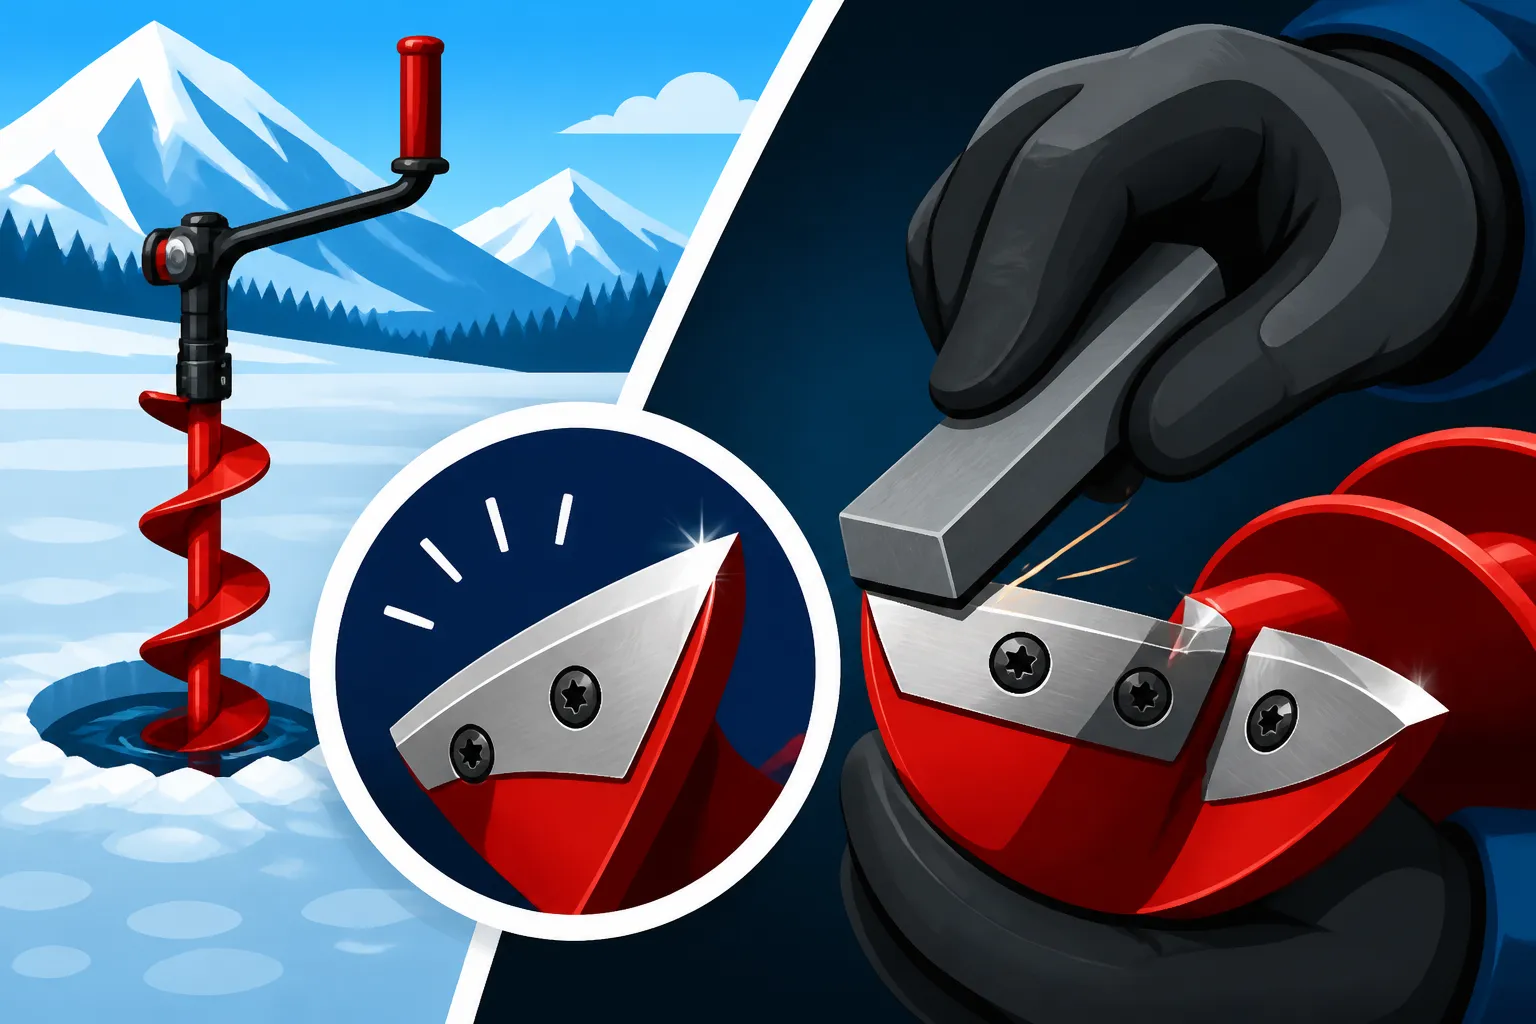
- Secure the Blade: Clamp one blade firmly in your vise or blade clamp. Ensure the cutting edge is exposed and stable. You want the blade's bevel facing upwards, ready for your file or stone.
- Identify the Bevel Angle: Your auger blades have a specific factory bevel angle. It's crucial to maintain this angle during sharpening. Use a permanent marker to color the entire bevel surface. As you make your first pass with the sharpening tool, you'll see where the marker is removed. This helps you identify if you're hitting the correct angle. If you're removing marker from the very edge, but not the entire bevel, your angle is too steep. If you're removing marker from the back of the bevel, but not the edge, your angle is too shallow.
- Start with the File (if needed): If your blade has significant nicks or chips, start with your flat file. Place the file flat against the bevel, maintaining the factory angle, and push it across the edge in one direction (away from you). Lift the file on the return stroke. The goal here is to remove material until the nicks are gone and you have a consistent edge. Don't apply excessive pressure; let the file do the work. Remember, we're not trying to create a new angle, just restore the existing one. Do this on all chipped areas or if the edge is very rounded.
- Move to the Sharpening Stone/Diamond Plate (Medium Grit): Once you've removed major imperfections, switch to your medium-grit sharpening stone or diamond plate. Apply a few drops of water or honing oil (check your stone's recommendations) to the surface. Again, place the stone flat on the bevel, maintaining that precise angle. Use smooth, consistent strokes, pushing the stone along the entire length of the cutting edge, always moving away from the edge. Continue until you feel a "burr" forming on the opposite side of the blade. This burr is a tiny wire-edge that indicates you've sharpened all the way to the apex.
- Refine with Fine Grit: Once you have a consistent burr along the entire length of the blade from the medium grit, switch to your fine-grit stone or diamond plate. Repeat the same process, using lighter strokes, still maintaining the angle. The goal here is to refine the edge and make it even sharper. This will reduce the size of the burr.
- Remove the Burr: The burr needs to be removed for a truly sharp edge. Gently flip the blade over and, holding the fine-grit stone almost flat against the back of the blade (at a very slight angle, just enough to remove the burr), make a few very light passes. You can also try stropping the blade on a piece of leather or cardboard to "break off" the burr. The goal is to cleanly remove it without dulling the fresh edge.
- Repeat for the Second Blade: Follow the exact same steps for your second blade, ensuring both blades achieve the same level of sharpness and the same angle. Consistency between blades is crucial for smooth cutting.
Here's a quick comparison of sharpening methods:
| Method | Pros | Cons | Best Use Cases |
|---|---|---|---|
| Hand Filing & Stone | Precise control, cost-effective, portable | Requires skill and practice, time-consuming | Minor nicks, regular maintenance, traditional blades |
| Electric Sharpener | Fast, consistent angle (if jigged), less effort | Higher cost, less portable, can remove too much material | Frequent sharpening, multiple augers, convenience |
| Replacement Blades | Easiest, guaranteed sharp, no skill needed | Most expensive, creates waste, not always available | Heavily damaged blades, deep nicks, time-constrained |
Finishing Touches and Reinstallation
You're almost there! Don't rush the last steps.
- Test Sharpness: Carefully (with gloves on!) test the sharpness. You can try to shave a thin strip off a piece of paper, or lightly run your fingernail across the edge (again, with extreme caution and gloves!). A truly sharp blade will grab your nail rather than slide over it.
- Clean and Oil: Wipe down the sharpened blades to remove any metal dust. Apply a very light coat of oil (like mineral oil or gun oil) to the cutting edges to prevent rust.
- Reinstall Blades: Carefully reattach the blades to your auger shaft. Make sure they are oriented correctly and that all bolts/screws are tightened securely. Do not overtighten, as this can strip threads or warp the blades.
- Store Properly: Always use a blade guard when your auger is not in use. This protects your newly sharpened blades from damage and protects you from accidental cuts. For winter storage, ensure blades are clean, dry, and lightly oiled. You can find excellent blade guards at Bass Pro Shops or online at Amazon.
When to Sharpen vs. Replace Your Blades
Knowing when to sharpen and when to bite the bullet and buy new blades is an important part of maintaining your ice auger. Sometimes, sharpening just isn't enough.
Signs Your Blade Needs Sharpening
Your auger will tell you quite clearly when its blades are dull. Pay attention to these tell-tale signs:
- Increased Effort: The most obvious sign. If you're having to push down much harder than usual, or if your gas/electric auger is bogging down more easily, the blades are likely dull.
- Slow Cutting: It takes significantly longer to drill a hole. Instead of a quick, clean cut, it's a slow, grinding process.
- Chattering or Vibrating: A dull blade tends to chatter and vibrate excessively as it struggles to bite into the ice. This isn't just annoying; it puts undue stress on your auger's motor and shaft.
- Uneven Holes: If your auger starts drilling angled or uneven holes, it's a strong indicator that one or both blades are dull or damaged.
- Ice Dust, Not Shavings: A sharp auger produces clean, curled ice shavings. A dull auger grinds the ice into a fine powder or slush.
If you're noticing any of these issues, it's definitely time to either sharpen your blades or consider replacing them. A properly maintained auger should cut quickly and smoothly through the ice. If you're ice fishing frequently, it's a good habit to check your blades before each trip, or at least every few trips, especially if you plan to hit popular spots like Strawberry Reservoir Ice Fishing Spots or Flaming Gorge Trophy Lake Trout Spots.
When Replacement is the Only Option
While sharpening can extend the life of your blades, there comes a point where it's no longer practical or even possible.
- Deep Nicks or Chips: If your blades have very deep nicks, large chips, or significant bends from hitting rocks or other debris, sharpening might not be enough. Removing enough material to get past these deep imperfections can drastically alter the blade's geometry, making it ineffective or even dangerous. Sometimes, it's just not worth the effort for a compromised blade.
- Excessive Wear: Over many seasons of sharpening, a blade might become too thin or too short. This can affect its structural integrity and its ability to cut efficiently. If your blades are significantly smaller than their original size, it's time for new ones.
- Rust and Pitting: While surface rust can be cleaned, deep pitting from corrosion can compromise the blade's edge and structural strength, making it impossible to achieve a reliable, sharp edge.
- Cost vs. Time: Sometimes, new blades are simply the most time-efficient option, especially if you value your fishing time over the effort of meticulous sharpening. While sharpening is more economical in the long run, if you're in a hurry and your blades are in bad shape, a fresh set ensures peak performance immediately. Many anglers keep a spare set of blades on hand for this very reason, a smart move for any serious ice angler. You can often find replacement blades easily at Bass Pro Shops or order them online.
Maintaining Blade Sharpness Between Trips
Prevention is always better than cure. A few simple habits can dramatically extend the life of your sharpened blades and ensure they're always ready for action.
- Always Use a Blade Guard: This is paramount. A good quality blade guard protects the delicate cutting edges from accidental bumps, drops, and contact with hard surfaces (like the bottom of your sled or truck bed). Make sure the guard fits snugly and is always on when the auger isn't actively cutting ice.
- Clean and Dry After Each Use: Before putting your auger away, wipe down the blades to remove any ice, water, or debris. Moisture is the enemy, leading to rust. A quick towel-dry is all it takes.
- Light Oil Coating: For longer storage or particularly humid conditions, apply a very thin coat of rust-preventative oil (like WD-40 or a silicone spray) to the blades. This adds an extra layer of protection against corrosion.
- Avoid Contact with the Ground: When drilling holes, try to avoid letting the auger blades scrape the bottom of the lake or come into contact with sand or gravel on shallow ice. Even a brief touch can put a serious ding in your carefully honed edge.
- Proper Storage: Store your auger in a way that prevents the blades from being jostled or striking other hard objects. Many anglers hang their augers or store them in custom cases. For multi-day trips, keep your blades protected even inside your Best Ice Fishing Shelter for Utah Winters.
By following these sharpening techniques and maintenance tips, you'll not only save money on replacement blades but also ensure that your ice auger is always performing at its best, making your How to Stay Warm Ice Fishing in Utah trips more enjoyable and less about wrestling with dull equipment.
Disclaimer
This article is for general informational purposes only and does not constitute professional advice. Laws, prices and regulations vary by location and change over time. Consult a qualified professional for guidance on your specific situation.