How to Keep Fish Fresh on a Hot Boat Ride Back to Shore
There's nothing quite like the thrill of reeling in a beautiful catch on a warm Utah morning, whether you're targeting walleye on Utah Lake or a feisty cutthroat at Strawberry Reservoir. But that triumphant feeling can quickly turn to frustration if you don't handle your fish properly after it hits the deck, especially when the sun is beating down and you've got a long boat ride back to shore. Many anglers worry about their hard-earned catch spoiling, losing that fresh, delicious flavor before they even get it home. This comprehensive guide will walk you through the essential steps, gear, and techniques to ensure your fish stays pristine from the moment it's caught until it's safely in your cooler and on its way to your dinner table.
The Science of Spoilage: Why Fish Go Bad So Quickly
It's easy to think that just throwing your fish in a cooler with some ice is enough, but understanding why fish spoil so quickly, especially in warmer temperatures, is the first step to preventing it. Fish meat is incredibly delicate and prone to rapid degradation, far more so than other types of protein like beef or chicken. The moment a fish leaves the water, a race against the clock begins.
Understanding Bacterial Growth and Enzymes
When a fish is caught, its natural defenses against spoilage begin to break down. The two main culprits are bacteria and enzymes. Bacteria, naturally present on the fish's skin, gills, and in its gut, begin to multiply rapidly once the fish is no longer alive and its immune system isn't functioning. These bacteria feed on the fish's tissues, producing compounds that lead to off-flavors, odors, and ultimately, spoilage. This process is significantly accelerated by warmth.
Beyond bacteria, the fish's own enzymes, which are vital for digestion and other bodily functions when alive, turn against its tissues after death. These enzymes, often referred to as autolytic enzymes, start breaking down proteins and fats, changing the texture and flavor of the meat. Think of it as a self-digestion process. While enzyme activity is a natural part of aging, high temperatures dramatically speed up this enzymatic breakdown, quickly diminishing the quality of your catch. Without immediate and proper cooling, even a prize-winning lake trout can become less than appealing within a few hours.
The Impact of Heat on Fish Quality
Heat is the absolute enemy of fresh fish. Every degree above freezing drastically reduces the time your fish will remain fresh and palatable. For every 10-degree Celsius (18-degree Fahrenheit) increase in temperature, the rate of spoilage can double. Imagine the blazing sun on a Utah summer day, reflecting off the water on Lake Powell Fishing Guide or Utah Lake Fishing Guide. If a fish is left baking on the deck, even for a short while, it's essentially cooking, and the flesh will quickly become mushy, discolored, and develop strong, unpleasant odors.
Warm temperatures not only accelerate bacterial growth and enzymatic breakdown but also promote fat oxidation. Many desirable fish species, like trout and kokanee salmon, have delicate fats that provide much of their flavor and tenderness. When exposed to heat and air, these fats oxidize, leading to a "fishy" taste and smell that is distinctly different from the pleasant aroma of a truly fresh fish. This is why quick cooling is paramount; it slows down all these detrimental processes, preserving the delicate texture, natural color, and delicious flavor you worked so hard to catch.
Essential Gear for Keeping Your Catch Fresh
You wouldn't go hiking in the Uintas without the right boots, and you shouldn't head out fishing in Utah without the proper gear to protect your catch. Investing in the right tools is just as important as your rod and reel when it comes to bringing home high-quality table fare.
The Importance of a Good Cooler
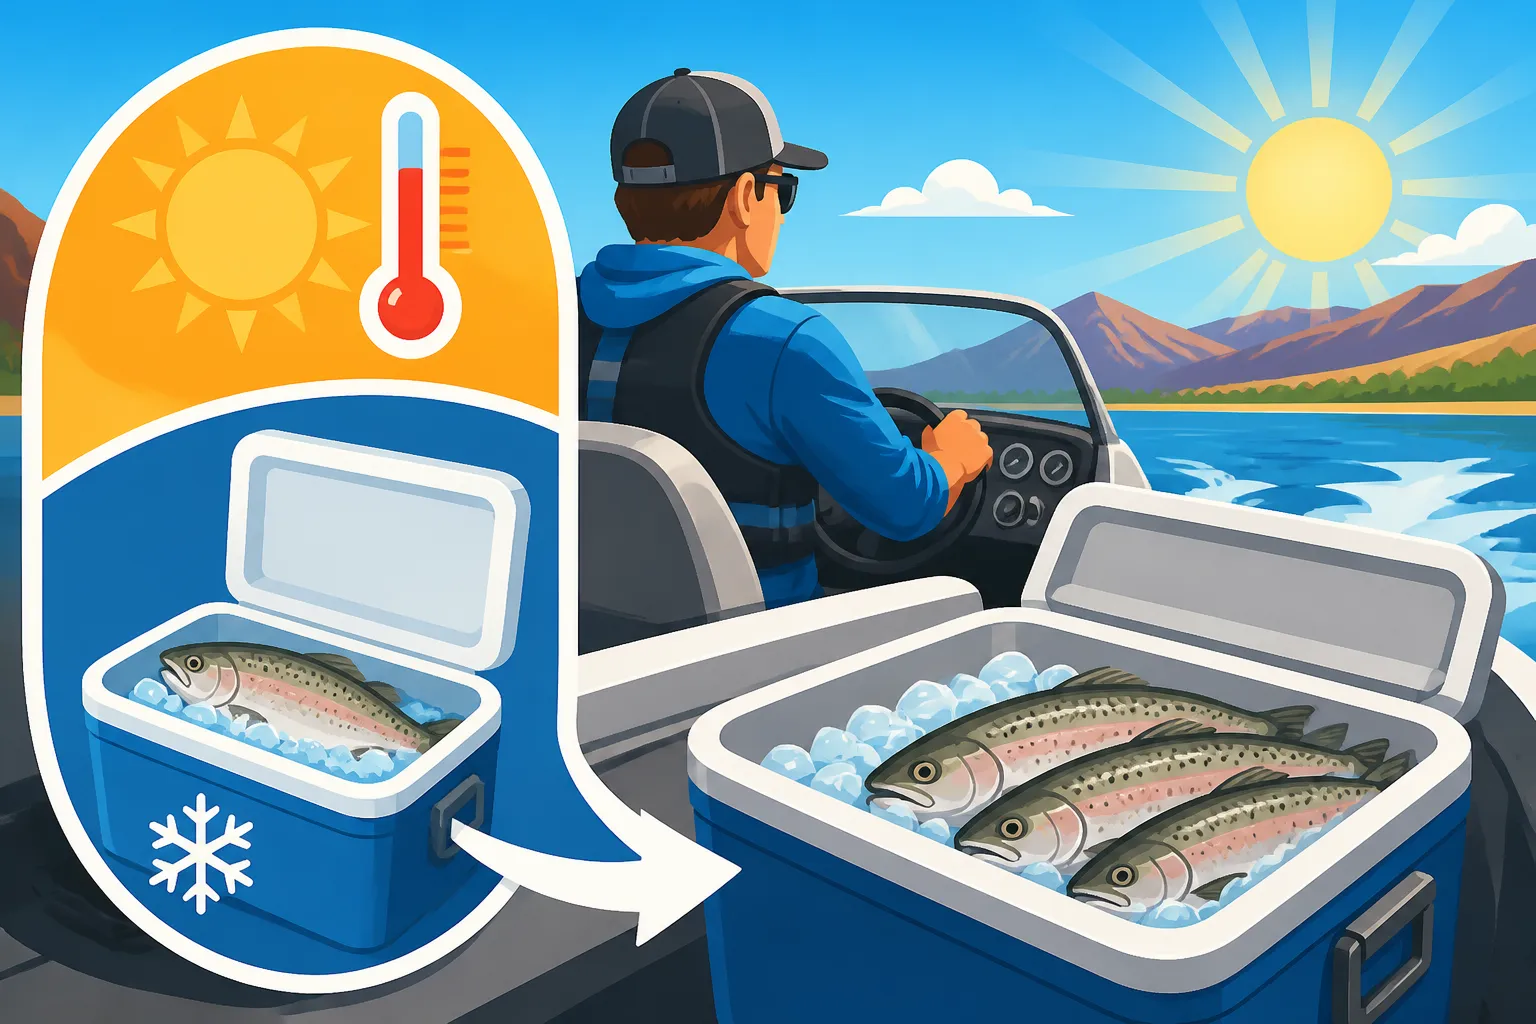
Your cooler isn't just a bucket; it's your fish's temporary refrigerator. A cheap, flimsy cooler might be fine for a few sodas, but it won't stand a chance against a hot boat deck and the body heat of a freshly caught fish. What you need is a well-insulated, heavy-duty cooler that can maintain internal temperatures, even on the hottest days. Look for models with thick walls, good lid seals, and sturdy latches. The better the insulation, the longer your ice will last, and the colder your fish will stay.
Consider the size of your cooler based on your typical catch and fishing trip length. Too small, and your fish will be crammed, making it hard to chill them properly. Too large, and you'll need a disproportionate amount of ice to cool the empty space. For longer trips or larger fish, a marine-grade cooler, often made by brands known for their rugged outdoor gear, is a worthwhile investment. You can find excellent options at places like Bass Pro Shops, which often carries a variety of sizes and insulation levels suitable for everything from a half-day trip to a multi-day adventure. Remember, a good cooler isn't just about keeping things cold; it's about minimizing temperature fluctuations, which are just as damaging to fish quality as outright warmth. For more on this, check out Best Coolers for Keeping Utah Fish Fresh.
Ice: More Than Just Frozen Water
You can have the best cooler in the world, but without enough ice, it's just a fancy box. Ice is the cornerstone of fish preservation on the water. However, not all ice is created equal, and how you use it makes a huge difference. Cubed ice from a convenience store is okay, but crushed ice or block ice can be even better. Crushed ice offers more surface area contact with the fish, promoting faster cooling. Block ice melts slower, helping to maintain overall cooler temperature for longer. A good strategy is to use a mix: a layer of block ice on the bottom, then crushed ice mixed with your fish.
And here’s a crucial tip: Pre-chill your cooler! A cooler sitting in a hot garage or truck bed before you even put ice in it will melt your ice much faster. Fill it with sacrificial ice and let it sit for a few hours before your trip, then dump that water and refill with fresh ice. This brings the cooler's internal temperature down, ensuring your main ice supply lasts as long as possible. Don't skimp on ice; a common rule of thumb is to use a 2:1 ratio of ice to fish, by weight. It might seem like a lot, but it’s cheap insurance for quality fish.
Portable Fish Cleaning Stations and Fillet Knives
While you might not do a full fillet on the boat, immediate field dressing is a game-changer for freshness. This means removing the gills and guts as soon as possible. To do this efficiently and cleanly on the boat, having the right tools is key. A sharp, durable fillet knife is indispensable. It doesn't need to be fancy, but it needs to hold an edge and be comfortable to handle. Many anglers carry a dedicated "gutting knife" that might be a bit sturdier for cutting through bones or gill plates.
A portable cleaning station or even just a designated cutting board can make the process much easier and cleaner on your boat. These can range from simple plastic boards to more elaborate fold-out tables with built-in sinks. For basic field dressing, a small, non-slip cutting surface is usually sufficient. You'll also want a sturdy brush or scraper to clean out the bloodline and any remaining viscera. Many practical, affordable options for these tools are readily available on Amazon or at any well-stocked tackle shop. After you've cleaned your fish, always rinse them thoroughly, preferably with cold water, to remove any blood and contaminants before placing them on ice. This rinsing significantly reduces bacterial load and improves the final taste. For tips on essential cutting tools, check out Best Fillet Knives for Utah Anglers.
Best Practices for Field Dressing and Immediate Care
The clock starts ticking the moment a fish is caught. How you handle it in those critical first few minutes and hours will largely determine its quality when it reaches your kitchen. These practices are designed to halt the spoilage process as quickly and efficiently as possible.
The Gilling and Gutting Method
This is perhaps the most critical step for preserving fish quality, especially if you won't be filleting them immediately. "Gilling and gutting" means removing the gills and all internal organs from the fish as soon as you land it. The gills are full of blood and bacteria, and the gut contains digestive enzymes that will rapidly break down the flesh.
Here’s how to do it efficiently:
- Bleed the fish: This is often done by cutting the gill arches or slicing through the throat, then placing the fish in a bucket of seawater or lake water (if clean and allowed) for a few minutes to let the blood drain. Bleeding not only removes blood (which can contribute to a "fishy" taste and rapid spoilage) but also kills the fish quickly and humanely.
- Remove the gills: Use your knife or a sturdy pair of shears to cut around the gill plates and sever the gills. Gills contain a lot of blood and mucus, which are breeding grounds for bacteria.
- Gut the fish: Make a shallow incision from the vent (anus) up to the jawbone along the belly. Be careful not to puncture the intestines, as this can release digestive contents onto the flesh. Scoop out all the internal organs with your fingers or a spoon. Make sure to scrape along the backbone to remove the kidney tissue (often a dark red line), as this also holds a lot of blood.
- Rinse thoroughly: Once gutted, rinse the cavity thoroughly with cold water to remove any remaining blood, mucus, or gut contents. This is a crucial step to prevent bacterial contamination and improve the final taste. Some anglers even bring a small spray bottle of fresh water for this purpose if lake water isn't ideal.
By performing these steps on the boat, you're dramatically slowing down bacterial growth and enzymatic degradation, setting your fish up for maximum freshness.
The Bleeding Process for Superior Taste
Bleeding your fish is a simple, yet often overlooked step that makes a monumental difference in taste and quality. Fish blood, particularly in the flesh, can break down quickly and contribute significantly to that strong, unpleasant "fishy" odor and taste. When you bleed a fish, you're essentially flushing out much of this blood before it can contaminate the meat.
There are a couple of common methods:
- Gill Slit: The most common method involves making a clean cut across the throat (the isthmus) to sever the main arteries and veins, or directly cutting through the gill arches.
- Ike Jime (Spiking): This Japanese technique involves quickly destroying the fish's brain with a spike (or "ike jime" tool) immediately after capture. This stops the stress response and prevents the release of lactic acid, which can degrade meat quality. While more advanced, it's considered by many to be the ultimate method for preserving fish quality. After spiking, bleeding is still often performed.
After bleeding, place the fish in a bucket of cold water or simply let it hang over the side of the boat (if conditions allow and it's safe) for 5-10 minutes to allow the blood to drain. You'll notice the water turn red as the blood is released. Once the bleeding stops, the fish is ready for gutting and icing. This process results in much whiter, cleaner-tasting fillets, free from the strong metallic or muddy flavors that can arise from un-bled fish.
The Icing Strategy: Layering and Drainage
Once your fish is bled, gutted, and rinsed, it needs to go on ice immediately and stay there. But it's not enough to just dump fish and ice into a cooler. A proper icing strategy maximizes cooling and prevents your fish from sitting in meltwater, which can actually promote spoilage.
Here's an effective layering technique:
- Bottom Layer of Ice: Start with a generous layer of ice on the bottom of your pre-chilled cooler. This creates a cold base and acts as a buffer.
- First Layer of Fish: Place your cleaned fish directly on the ice. Try to keep them from touching each other too much if possible, allowing maximum ice contact.
- Intermediate Layer of Ice: Cover the first layer of fish completely with another thick layer of ice. Ensure ice gets into the gutted cavity of each fish.
- Repeat Layers: Continue layering fish and ice until your cooler is full.
- Top Layer of Ice: Finish with a final, thick layer of ice on top.
Crucially, do not let your fish sit in meltwater. Meltwater, though cold, is no longer as effective as solid ice and can become a breeding ground for bacteria if it accumulates. Many quality coolers have a drain plug; keep it open or periodically drain the water to ensure your fish are always surrounded by solid ice, not sitting in a cold bath. If the boat ride is long and the day is hot, replenish the ice if needed. This consistent chilling and proper drainage are what ensure your fish remains in prime condition all the way back to shore.
Advanced Techniques for Extended Freshness
Sometimes, a standard cooler and ice just aren't quite enough, especially on those sweltering Utah summer days or if you're planning an extended trip where your catch needs to last longer. These advanced techniques provide an extra layer of protection, ensuring your fish stays fresher for even longer.
Slurry Ice: The Secret Weapon
While solid ice is good, slurry ice is even better, particularly for rapid cooling and preventing freezer burn or surface damage. What is slurry ice? It's simply a mixture of finely crushed ice (or small ice cubes) and very cold saltwater. The salt lowers the freezing point of the water, allowing the slurry to get colder than plain ice water (often below 32°F / 0°C) without actually freezing.
Here's why it's so effective:
- Maximum Contact: A slurry completely envelops the fish, getting into every crevice and cavity, providing 100% surface contact for extremely rapid and uniform chilling. This immediate drop in temperature is key to shutting down bacterial growth and enzymatic activity.
- Prevents Bruising: The semi-liquid nature of the slurry cradles the fish, protecting it from being bruised or damaged by hard ice chunks or by jostling on a bumpy boat ride.
- Consistent Temperature: As it melts, a slurry maintains a more consistent super-cold temperature than ice alone, which tends to warm up as it melts into plain water.
To create a slurry, fill your cooler about 1/3 to 1/2 full with ice, then add cold water. Stir in a generous amount of non-iodized salt (rock salt or pickling salt works well, roughly 1 cup per gallon of water) until it dissolves. Add your bled and gutted fish directly into the slurry. Ensure the fish is fully submerged. This method is highly recommended for delicate species like kokanee salmon or trout, where preserving texture and flavor is paramount.
Using Specialized Fish Bags and Kill Bags
For those who regularly target larger fish or spend multiple days on the water, specialized fish bags or "kill bags" can be a fantastic upgrade from a standard cooler. These are essentially highly insulated, soft-sided coolers designed specifically for holding fish. They often feature:
- Superior Insulation: Many kill bags boast insulation levels comparable to or even better than some hard-sided coolers, keeping ice longer and internal temperatures colder.
- Durability: Made from heavy-duty, puncture-resistant materials, they can withstand sharp fins and hooks.
- Easy Storage: Unlike rigid coolers, many kill bags can be rolled up or folded when empty, saving precious space on your boat, especially on smaller craft.
- Cleaner Handling: They often have waterproof liners that make cleanup easy and prevent smelly fish odors from permeating your boat.
You can often find these specialized bags at larger outdoor retailers like Bass Pro Shops, or through online vendors. While they might be an investment, they provide a flexible, highly effective solution for keeping big fish, or a large volume of fish, perfectly chilled throughout a long day or even several days on the water. Pairing a kill bag with a slurry ice mixture creates an unbeatable system for maximum freshness. This is especially useful for longer trips to places like Flaming Gorge Fishing Guide where you might be targeting trophy lake trout.
Keeping Your Cooler Out of the Sun
This might seem obvious, but it's often overlooked. Your cooler's insulation works hard to keep the cold in and the heat out, but direct sunlight will make it work overtime, accelerating ice melt. On a bright, hot day, the surface temperature of your cooler can easily climb, even if it's white.
Take these simple steps to protect your cooler:
- Find Shade: Position your cooler in the shadiest part of your boat. This might be under a bimini top, within a boat cabin, or even under a tarp or wet towel if no other shade is available.
- Cover it Up: If shade is scarce, drape a light-colored, wet towel over your cooler. The evaporative cooling effect can help reduce the surface temperature, and the light color will reflect sunlight.
- Avoid Heat Sources: Keep your cooler away from hot engine compartments, exhaust vents, or dark surfaces that absorb and radiate heat.
Every little bit helps. By minimizing the heat load on your cooler, you extend the life of your ice, and in turn, the freshness of your precious catch. Coupled with good field dressing, plenty of ice, and perhaps even a slurry, keeping your cooler out of direct sunlight is a simple yet highly effective way to ensure your fish are as fresh at home as they were when they came out of the water. For more general advice on preparing for your outing, you might find our Utah Fishing Gear Guide helpful.
| Method | Pros | Cons | Ideal For |
|---|---|---|---|
| Basic Ice in Cooler | Simple, common, affordable | Fish can sit in meltwater, slower cooling | Short trips, smaller catches, cooler weather |
| Slurry Ice in Cooler | Rapid, even chilling; protects fish from bruising | Requires salt and more specific ice prep; can be messy | Delicate fish, longer trips, hot weather, maximizing quality |
| Insulated Kill Bag | Excellent insulation, durable, portable, easy to clean | Higher initial cost, still needs ice/slurry | Large fish, multi-day trips, space-saving on boat |
| Direct Sun Exposure | No pros | Rapid spoilage, mushy flesh, "fishy" taste, wasted effort | Never recommended |
Bringing your catch home fresh is just as rewarding as catching it. By understanding the science of spoilage and implementing these practical tips and techniques, you'll ensure that every fish you keep from Utah's bountiful waters arrives at your kitchen in peak condition, ready to be enjoyed. Don't let a hot boat ride ruin your hard work; equip yourself with the knowledge and gear to preserve that fresh-caught flavor.
Disclaimer
This article is for general informational purposes only and does not constitute professional advice. Laws, prices and regulations vary by location and change over time. Consult a qualified professional for guidance on your specific situation.