How to Anchor an Ice Fishing Shelter in Wind
There’s nothing quite like the solitude and thrill of ice fishing on a crisp Utah winter day. The silence, the focused pursuit, the anticipation of a bite – it’s pure magic. But then, WHAM! A sudden gust of wind whips across the frozen expanse, and that peaceful scene turns into a nightmare as your carefully erected ice fishing shelter starts to dance, skitter, or even threaten to take flight across the ice. It’s a frustrating, often terrifying moment that can ruin a day on the hard water. This guide is here to walk you through exactly how to anchor your ice fishing shelter in the wind, ensuring your setup stays put, your gear stays safe, and you can focus on what matters: catching fish.
Why Wind is the Ultimate Ice Fishing Nemesis
We’ve all been there. You arrive at your chosen spot on Deer Creek or Strawberry Reservoir, eager to drop a line. The air is calm, maybe a light breeze, perfect conditions. You get your shelter popped up, heater going, and then, as if from nowhere, the wind decides to make an appearance. It’s not just annoying; it’s genuinely dangerous, and it highlights just how exposed you are on the ice.
The Unexpected Force of Lake Winds
Frozen lakes are vast, flat expanses, often with little to no natural windbreaks. Unlike fishing a sheltered cove on a river, out on the open ice, there's nothing to slow down or deflect those powerful gusts. The wind gathers speed over miles of unobstructed surface, hitting your shelter with full force. It’s a different beast than a breezy day on open water in the summer. What might feel like a gentle breeze on shore can become a sustained assault on the ice. This can create a constant, unnerving tug-of-war between you, your shelter, and the elements.
The psychological impact alone can be draining. You're constantly listening, bracing, half-expecting your hub shelter to collapse or your flip-over to get ripped from its moorings. It takes away from the enjoyment of the moment and forces you to worry about something other than your jigging technique or when the next bite will come. Trust me, I've spent many a day on the ice, shivering not just from the cold, but from the anxiety of an unsecured shelter.
Safety Hazards Beyond Frustration
It's easy to dismiss a runaway shelter as merely an inconvenience, but the reality is far more serious. A loose ice fishing shelter can quickly become a dangerous projectile, especially on a busy lake. Imagine your shelter, propelled by a 30 mph gust, sliding across the ice towards another angler, their children, or even worse, their vehicle. It's not just a hypothetical; it happens. The hard poles and fabric can cause significant damage or serious injury.
Beyond the risk to others, there’s the immediate danger to yourself. Trying to wrestle a large, wind-filled nylon kite back into submission on slippery ice is a recipe for disaster. A fall could lead to bumps, bruises, sprains, or even more severe injuries like concussions or broken bones, especially if you hit your head on the ice or your own gear. And let’s not forget the financial hit. A lost or damaged heater, an expensive fish finder skittering across the ice, a tackle box spilling its contents – these are all very real possibilities if your shelter isn't properly secured. You’ve invested good money in your setup, and the last thing you want is for it to be scattered to the four winds.
Essential Anchoring Gear for Windy Days
Preparing for wind isn't just about hoping for the best; it's about having the right tools for the job. Just like you wouldn't go out without your auger, you shouldn't head out without a solid anchoring strategy and the gear to back it up.
The Right Ice Anchors Make All the Difference
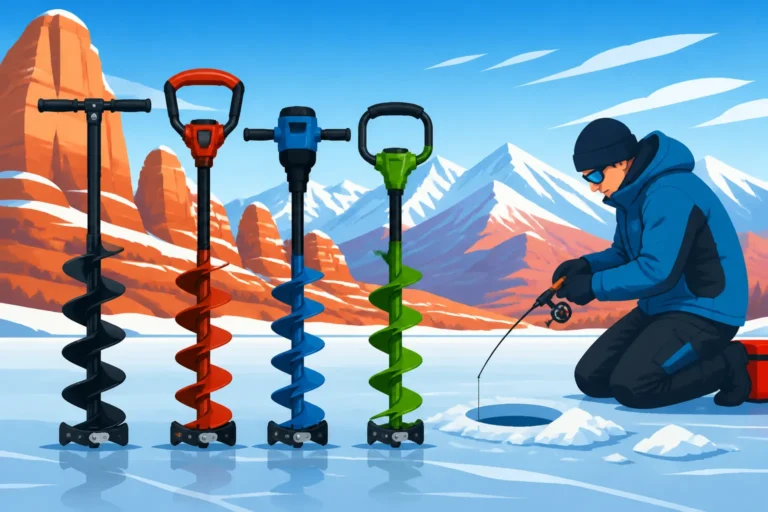
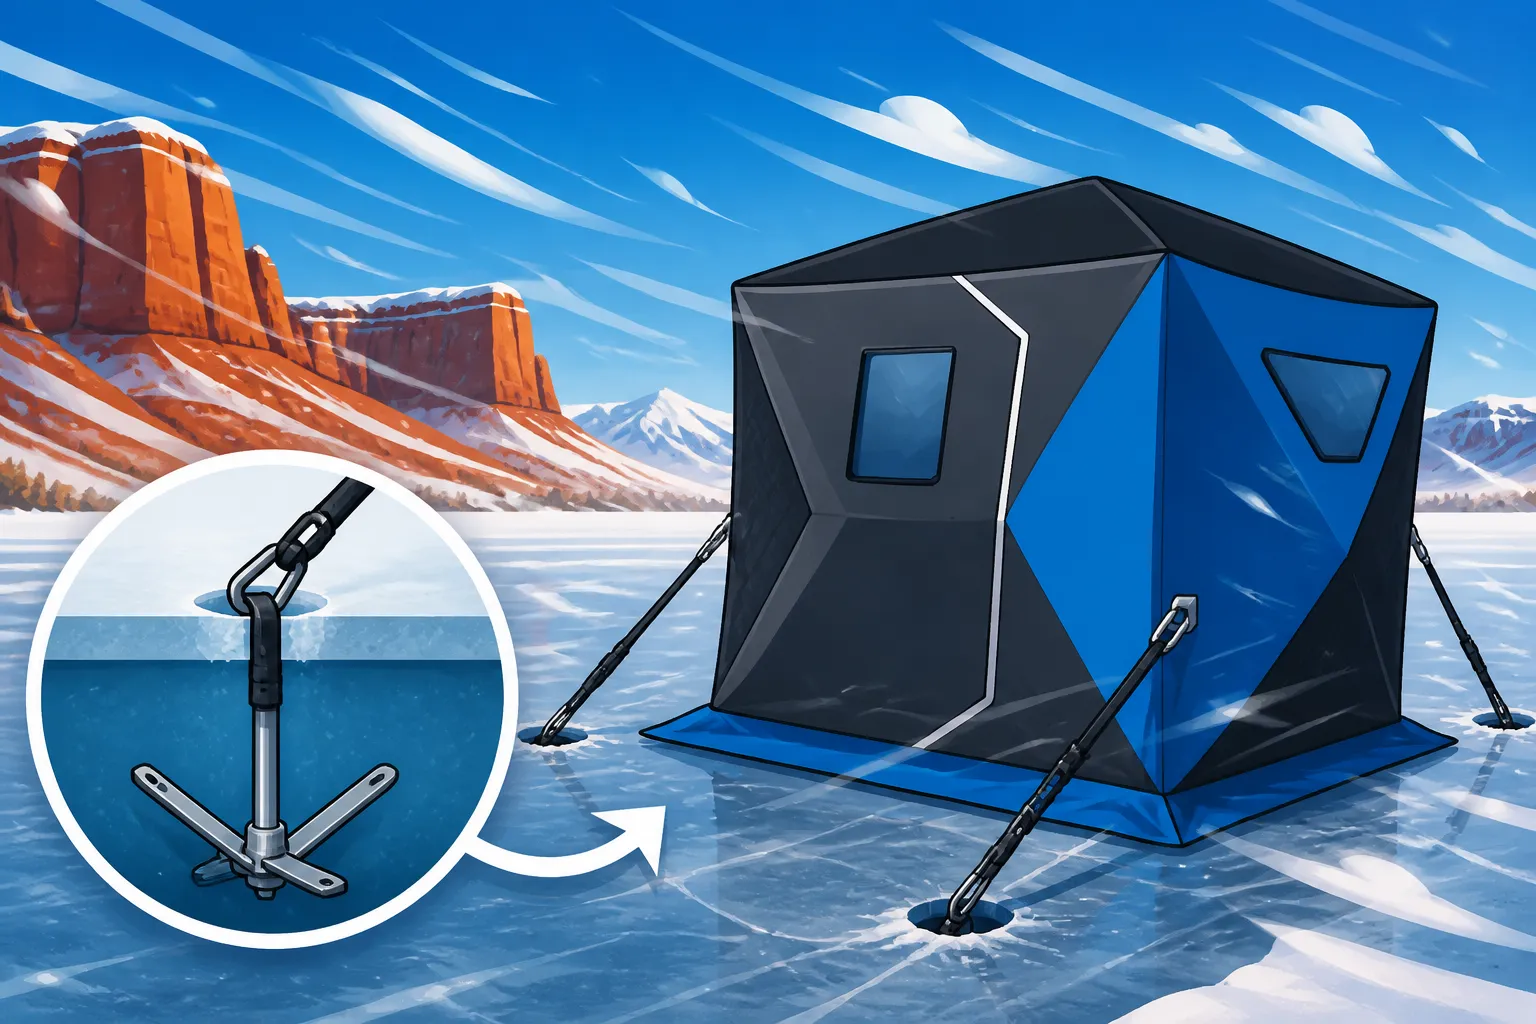
When it comes to keeping your shelter grounded, not all ice anchors are created equal. The standard for most modern ice fishing shelters are screw-in ice anchors. These are designed with sharp, deep threads and a robust handle (or a head for a drill adapter) that allows them to bite firmly into the ice. Quality here really matters. Cheap, flimsy anchors can strip their threads in hard ice, bend under pressure, or have handles that snap off, leaving you in a real pickle. Investing in anchors from reputable brands like Eskimo, Clam, or Shappell is worth every penny. These are built to withstand the rigors of cold weather and tough ice.
For most anglers, the biggest decision regarding screw-in anchors is whether to go with hand-screw or drill-adapter anchors. Hand-screwing can be a real workout, especially when the ice is thick and hard. Your hands will ache, and it takes time and effort. This is where a drill adapter becomes a game-changer. These attachments fit into the chuck of a cordless drill, allowing you to power-drive your anchors into the ice in seconds. It’s a huge time and energy saver, particularly if you’re setting up multiple anchors or fishing alone. When using a drill, make sure it's a powerful one (18V or higher, often available at retailers like Bass Pro Shops or online at Amazon) with a good battery and, ideally, a spare. You don't want your drill dying halfway through the process!
While screw-in anchors are the gold standard for shelters, you might encounter other types. Simple ice stakes are essentially large, heavy-duty tent stakes. They can work in softer ice or packed snow but lack the secure bite of screw-in anchors for firm ice and high winds. Some anglers even use deadman anchors, which involve tying off to a heavy object (like a log, a filled sandbag, or even a bucket of ice) and burying it in the snow or slush. These are more of a last resort or supplementary anchoring method for exceptionally tricky conditions, not your primary line of defense.
Robust Straps and Ropes are Your Lifelines
Once you have your anchors, you need to connect them securely to your shelter. This isn't the time to grab those flimsy bungee cords you use for securing tarps in the backyard. For serious wind, you need heavy-duty straps or ropes. Look for straps made of durable nylon or polyester webbing, often with integrated clips, carabiners, or sturdy buckles. These materials resist stretching, abrasion, and freezing, maintaining their integrity even in bitter cold. Many dedicated anchor kits come with purpose-built straps that are designed to connect seamlessly to your shelter’s tie-down points.
Most modern ice fishing shelters, especially hub-style models, come with reinforced grommets, D-rings, or webbing loops at each corner, and sometimes along the sides. In even moderate wind, using all available primary anchor points is crucial. For a typical hub shelter, this means at least four anchors, one for each corner. However, on truly windy days, if your shelter has additional tie-down loops on the side walls, using extra anchors there can make a world of difference in preventing the fabric from flapping excessively and putting undue strain on the main corners. Think of it as distributing the load; the more points of contact with the ice, the more resistant your shelter will be to wind.
Many shelter manufacturers, such as Clam or Eskimo, offer specific anchor kits that are either included with the shelter or can be purchased separately. These kits often contain the ideal number and type of anchors and straps for their particular shelter models, making it easy to get everything you need in one go. You can often find these specialized kits at large outdoor retailers like Bass Pro Shops, or with a quick search on Amazon for your specific shelter brand.
| Anchor Type | Pros | Cons | Ideal Conditions |
|---|---|---|---|
| Hand-Screw Ice Anchor | Reliable, no power tools needed, simple | Labor-intensive in hard ice, slower setup | Moderate ice thickness, lighter winds, no drill |
| Drill-Adapter Anchor | Fast, easy, less physical exertion | Requires a powerful cordless drill with good battery | Hard, thick ice, strong winds, quick setup |
| Ice Stake | Lightweight, simple | Less secure in hard ice, can pull out easily in wind | Soft ice, packed snow, very light wind |
| Deadman Anchor | Good for soft/slushy ground where others fail | Bulky, requires burying objects, time-consuming | Very soft ice, deep snow, emergency situations |
Step-by-Step: Anchoring Your Shelter Like a Pro
Now that you have your gear, let’s walk through the process of setting up and anchoring your shelter so it stands strong against whatever Mother Nature throws at it. It's a method honed over many windy days on the ice, designed to keep your shelter exactly where you want it.
Site Selection and Initial Setup
Before you even think about popping up your shelter, take a moment to assess your surroundings. Observe the wind direction. If possible, try to orient your shelter so that its narrowest side is facing directly into the prevailing wind. This presents the smallest profile to the wind, reducing the surface area it has to push against. It's a small detail, but it can make a big difference in how stable your shelter feels. Also, clear any loose snow or slush from the area where your shelter's base will sit. A clean ice surface provides better friction and a more stable foundation.
Next, carefully unpack your shelter. If it's a hub-style pop-up, don't rush to extend all the walls at once. Get the base roughly in position first. For flip-over shelters, ensure the sled is oriented correctly, preferably with the front (where your door or opening is) facing away from the worst of the wind. A crucial tip for windy days: if you’re using a hub shelter, consider partially extending just one or two sides, or even keeping it somewhat collapsed, while you get your initial anchors in. This prevents the shelter from acting like a massive sail and taking off before you’ve had a chance to secure it. If you have a fishing buddy, now is the time to ask for their help; an extra set of hands to hold the shelter down can prevent a lot of grief.
The Anchoring Sequence – Securing Each Point
This is where the real work begins. The key to effective anchoring is to secure the most vulnerable points first and create tension that stabilizes the entire structure.
- Start with the Windward Side: Begin by identifying the two corners of your shelter that are facing directly into the wind (the "windward" side). These are the points that will take the initial brunt of any gusts. Screw in your ice anchors firmly at these two corners. When inserting them, make sure they are angled slightly away from the shelter, rather than straight down. This angling creates better leverage and maximizes the holding power against an upward or sideways pull from the wind.
- Attach and Tension: Once the first two anchors are securely in place, attach your heavy-duty straps or ropes to the shelter's tie-down points and then to the anchors. Pull them taut, but don't over-tighten just yet. The goal at this stage is to provide initial stability and prevent the shelter from shifting or blowing away while you work on the rest. This creates a solid foundation.
- Full Extension (Hub Shelters) and Remaining Anchors: If you have a hub-style shelter, now is the time to fully extend all the walls. With the windward side already secured, the shelter is less likely to become a kite. Proceed to the remaining corners, repeating the process of screwing in anchors at an angle and attaching the straps. Once all anchors are in, go back and adjust the tension on all straps. They should be tight enough to eliminate any flapping or excessive movement in the fabric, but not so tight that they put undue stress on the grommets or risk tearing the shelter material. You're looking for firm and stable, not drum-tight.
- Flip-Over Shelter Specifics: For flip-over shelters, the heavy sled base provides inherent stability. You'll typically find tie-down points on the front and back of the sled, or on the frame itself. Anchor these points, often with two anchors at the front and two at the back, following the same angled technique for maximum hold. The weight of the sled means fewer anchors are often needed compared to a hub shelter, but don't skimp in high winds.
Reinforcement and Ongoing Checks
Anchoring your shelter isn't a one-and-done deal. To truly weatherproof your setup and ensure ongoing safety, you need to think about reinforcement and regular monitoring.
After all your primary anchors are in place and tensioned, take a walk around the perimeter of your shelter. Give each strap a gentle tug and feel for any looseness or excessive play. Many hub shelters also have additional tie-down loops on the sides, midway between the corners. On exceptionally windy days, or if you plan to be out for an extended period, utilizing these extra points with additional anchors provides significant reinforcement and helps prevent the fabric from ballooning and straining the main corner seams. It's a small effort that pays big dividends in peace of mind.
One of the most effective, yet often overlooked, steps is to use your snow skirts. Most modern ice fishing shelters have an extended fabric skirt around the base. Once your shelter is anchored, pile snow, slush, or even a layer of ice chips around this skirt. This serves a dual purpose: it seals out drafts, making your shelter much warmer and more comfortable, and it adds considerable weight and stability to the entire structure. By preventing wind from getting underneath the shelter and trying to lift it, you drastically reduce the chance of it becoming airborne.
Finally, and this is crucial, regularly check your anchors throughout the day. Ice conditions can change. Strong, constant wind can work an anchor loose. The warmth from your heater might cause localized melting around an anchor, loosening its grip, which could then refreeze, making it seem secure when it’s not. A quick walk around the shelter every few hours, giving each anchor strap a firm pull, can alert you to a potential problem before it escalates. It's an easy habit to adopt and one that can save you a lot of trouble. You might even want to consult a guide like How to Check Ice Thickness Safely Before Ice Fishing to understand ice conditions better as the day progresses.
Advanced Tips and Common Pitfalls to Avoid
Even with the best gear and a solid plan, ice fishing in the wind can throw curveballs. Knowing how to handle tough conditions and avoid common mistakes can make your day much safer and more enjoyable.
Overcoming Hard Ice and Tricky Conditions
Utah’s winter ice can range from relatively soft and fresh to incredibly hard and thick, especially later in the season or on larger, deeper reservoirs like Flaming Gorge. Trying to hand-screw anchors into hard, old ice is an exercise in futility and frustration. Your hands will ache, your anchors might get dull or even bend, and you’ll waste precious fishing time. This is where a high-quality cordless drill with an anchor adapter becomes almost a non-negotiable piece of gear for serious ice anglers. Brands like DeWalt, Milwaukee, or Makita offer powerful, reliable drills that, when paired with a good adapter (often available on Amazon), can sink anchors in seconds. Just ensure your battery is fully charged and consider carrying a spare, as cold weather can reduce battery life. If you're using a power auger, often the same battery system can be used, streamlining your gear. Best Ice Augers for Utah Ice Fishing can offer more insights into power tools for the ice.
What about those tricky conditions like slushy ice or areas with a thick layer of snow over soft ice? In these scenarios, traditional screw-in anchors might not get a solid bite. They can spin out or simply pull free under pressure. This is when you might need to get creative. Longer ice anchors can sometimes reach harder ice underneath the slush. Alternatively, you might need to employ those "deadman" anchoring techniques we mentioned earlier. This could involve tying your strap to a log, a heavy rock, or even a canvas bag filled with snow, then burying that object deep in the slush or packed snow. It's more work, but it provides a secure anchor where others fail. Always be acutely aware of How Thick Does Utah Ice Need to Be Before You Can Fish On It?. Never attempt to set anchors where the ice feels questionable or near visible pressure cracks or open water. Your safety is paramount.
The Importance of a Buddy System and Preparedness
Ice fishing, while often a solitary pursuit, is always safer with a companion. When faced with sudden, severe wind, having an extra set of hands to hold down a flailing shelter can be a lifesaver, preventing injury and keeping your gear intact. Even just having someone to help with the initial setup and anchoring can make a huge difference, especially if the wind picks up unexpectedly. It’s also just more fun to share the experience!
Beyond having a buddy, always, always carry extra anchors and straps. Things get lost, things break, or you simply might find yourself in windier conditions than anticipated and realize you need more anchoring points. Consider it your emergency kit for the elements. It's far better to have a few spares rattling in your sled than to be frantically trying to retrieve a runaway shelter. You might also want to read How Many Ice Fishing Rods Can You Use at Once in Utah? to understand the rules around your setup if you're fishing with multiple lines.
Finally, proper preparedness extends to your personal gear and tools. Beyond your drill and anchors, a good pair of insulated, waterproof gloves is non-negotiable. Trying to screw in anchors or tie knots with cold, numb fingers is not only miserable but inefficient and dangerous. A multi-tool or a small wrench might be helpful for tightening bolts on your shelter frame or adjusting anchor straps. And remember to bundle up. How to Stay Warm Ice Fishing in Utah and How to Layer Clothing for a Utah Winter Fishing Trip offer excellent advice on staying comfortable in freezing conditions, because a cold angler is a distracted angler, and distraction leads to mistakes. Being ready for the conditions, both for your shelter and yourself, is the ultimate way to ensure a successful and safe day on the ice.
Disclaimer
This article is for general informational purposes only and does not constitute professional advice. Laws, prices and regulations vary by location and change over time. Consult a qualified professional for guidance on your specific situation.